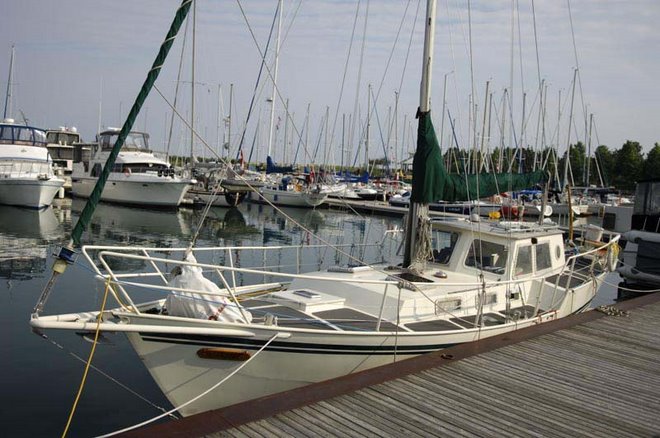
Copyright (c) Marc Dacey/Dark Star Media 2006-2026. Above photo (c) Marc Dacey. Powered by Blogger.
Showing posts with label Hardware. Show all posts

2020-02-24

Workshipping (2)

Six bolts ought to do it.
When last we gathered, I had had welder/fabricator Andrew Barlow make up one of his simpler efforts, a three-piece steel frame for the starboard side of the forepeak "workshop", so I could better allocate spares, tools and other items, such as line, cable and wire.

What Mrs. Alchemy gets up to whilst I am swearing at the bow: a much-needed repainting of the pilothouse interior.
Given the size of the forepeak, however, construction within is largely a solo effort; besides, given that I have a touch of tendonitis in one shoulder (which is better than a torn rotator cuff, according to my "tough love" physician), no one needs to hear that much vile sailor talk when I am bearing down on a Makita drill.
Moving a couple of toolboxes elsewhere on a boat is predicated in large part on keeping things from moving. To date, I've relied on eye straps and shock cord. And certain mechanical aids, such as the chunk of wood meant to confine the spares box.
The box is cheap, but fit for purpose. It's half spares storage and half tools I want to hand in this work space.
The lashing down of fairly heavy boxes is provisional at the moment. I may put further chocks or hold-downs to keep said containers in place should the sea prompt quick action. Or if I have to access something while we are flailing about. The point is that the above toolbox, which weighs about 18 kilos, is now about 30 cm. aft of where it was on the port side. Which, from a boat trim point-of-view, is desirable.
This box contains a couple of sanders and some hardware odds and ends. It's light and can therefore go forward without much penalty.
There's a small work area left free of stowage. A bigger area now exists on the "heavier-duty" port side. Beneath both workbenches are eye bolts for stowing line, anchors and any appropriately sized gear capable of fitting in the space. Should this gear amount to significant weight, I can remove or reposition trim ballast (lead ingots) off the boat or further aft.
Where the eye bolts go. There's a fair bit of space here in which spare/specialty lines can be kept neat and ready.
Clearly, I'm not finished yet. Some sort of coating to preserve that fresh plywood would be advisable, but one calm, warm day this coming spring can see that completed. Also, there's a foredeck full of gear and line wanting stowage in this currently unstowed space. This, too, shall pass.

The underside. Lines/gear can hang on carbiners or just via loops on these eye bolts. If I need chafe gear, I'll install it.
There's room at the end for sail stowage. Currently, there's a spare main, which will go in newly made space in the aft cabin (yes, more on this shortly); a storm jib of ridiculous heaviness; a smaller staysail than the one rigged, just acquired today; and a cruising spinnaker. The last three sails are light, or rather, lightish, and at perhaps 12 kilos in total, can sleep in the pointy end, especially if I move several dozen kilos of chain down and aft.
Behold "the closet". It's where pointy, light things will live.
The last portion of the new construction is "the closet". You'll have to visualize that worklight cord and the anchor windlass conduit cleanly secured on the outside of the little length of wood on the hinge. The reason for the hinged wood? I have a lot of pointy, awkward objects, such as oars, plastic Portabote thwarts, Alchemy's 2.2 metre tiller, nesting dinghy mast parts, and mostly et cetera, which, while not particularly heavy, take up some space, particularly vertical space. Being tall and not alive, they tend to fall down, even more often at sea. So I need a place to stow them, either on a series of hooks and loops overhead, or in this snug spot seen above. That little piece of wood is not strong enough to keep anything truly set in motion in place, but it is enough to stop things from tipping out of that space, especially when lashed down.

Or so I hope. Like most of my ideas, "provisional" is the keyword.

2020-02-16

Cabinet shuffle

Behold! Custom cabinetry. That microwave is actually a dead version of the one we currently use and which is "right-sized", at a mere 700W of draw, for occasional use aboard.
What is stowage? More than just a mispronunciation of "storage", stowage is specifically securing items on a boat so that they can't fly free on a seaway, which would be comical were a rubber spatula involved, and fatal with a large, full can of paint or "Big Bertha", your favourite motor mount persuader.
Yes, this is the sort of tedious detail with which I plague craftspeople who know their business.
The stowage lacking on the good ship Alchemy is has been centered in the forepeak workshop (more to come soon on that topic) and in the galley. As discussed in the latter half of this post, there was a big empty space above the sinks just crying out to be filled with useful stowage, and to do so in a way that was functional and didn't look like treefort-grade crap was beyond my skill set.

Enter Fred Blair. Fred is a pal of my father-in-law, Dave McMurray, who designed boats and ran a Pickering, Ontario-based chandlery in the 1980s. Fred and Dave connected via that work and presumably found common cause as Fred is a "Shipwright, Cabinet Maker, Custom Woodworking" person held in high esteem by Dave. So we met in January and he took the job, which was good for us as we had had poor luck to that point getting this particular task fulfilled.
Photo (c) Fred Blair: Shipwright, Cabinet Maker, Custom Woodworking
As can be seen, the cabinet we wanted was, design-wise, pretty basic, but had to be of undisputed strength, given the motion of the ocean and the prospect of jamming it with not-entirely light cookware.
Photo (c) Fred Blair: Shipwright, Cabinet Maker, Custom Woodworking
Early on, we decided against the five-inch-tall "mug rack" below the microwave "nook" in favour of taller cupboards on top. This allows a more logical arrangement of wide, short things, such as barbeque tools and our electric grill, up top, and pots and/or bulk food supplies below.

Routering the right way.. Photo (c) Fred Blair: Shipwright, Cabinet Maker, Custom Woodworking

Fit and finish with the hinges of wonderment. Photo (c) Fred Blair: Shipwright, Cabinet Maker, Custom Woodworking
The interiors are beautifully finished; the only alterations I've made, save for the mounting holes drilled earlier today, are to put a series of vent holes on the underside of the dish storage area. If dishes are stowed still a little damp, they can drain over the sink closer to the centerline.
Varnishing. Photo (c) Fred Blair: Shipwright, Cabinet Maker, Custom Woodworking

In addition, the internal shelves and separators can be moved about and independently secured as needed, and the rear of the microwave compartment is well-vented to lessen the chance of overheating.
The finished product at the shop. Photo (c) Fred Blair: Shipwright, Cabinet Maker, Custom Woodworking
The hinges are something else. They close almost hydraulically and once I install the magnets Fred provided, I suspect they'll need a fair bit of force to open, which is desirable on an ocean-bound vessel as we hope to sail.
Even the back is pretty.
Installation of a cabinet made of 3/4" marine plywood means some tricky maneuvering. I'm not sure what this cabinet weighs, but it feels similar to our 30 kilo SPADE anchor, Naturally, one item is made for dropping and the other isn't. After measuring out and drilling some mounting holes (note the big and torquey Makita drill I trot out for whipping through steel bulkheads), I had to fab up a sort of strut to keep the cabinet, which at one point had all three of us positioning it freehand over the sinks, supported while I drew drill marks on its future home.
The leftovers from the boat cover construction find a use.
A quick blast of epoxy paint on the bare metal, which still took, Makita enthusiasm notwithstanding, three drill bit changes to get up to the desired 1/2 inch bolt hole sizing, and we were ready to dog down.
This will be recovered by the fitted cherry strips that were there before. I don't think the bolts I've used will be too proud.
 And here's the result. The internal partitions were removed for reasons of access.
Fits like a charm. Picture a spice rack in that space above.
The mounting bolts have washers either side of the bulkhead and the cabinet, and are secured by heavy Nylok nuts. Picture also some sort of 12 VDC pointing directly down into the sinks.
There is not a huge amount of clearance here, but I can see to wash, and Mrs. Alchemy, at a foot shorter, likes the ease of access to the cabinet contents.
This cabinet solves a lot of problems for us. That open area on the side-mounted cabinet held the microwave before, and is now freed up to hold food or bottles. The cabinet is strong enough and well-bolted enough to have on its side a handhold to make the transit to and from the pilothouse safer. All in all, we are well-pleased, and will be even more so once it's filled with our kitchen stuff. Thanks, Fred! And thanks to FiL Dave for connecting us with such a talented craftsman.

2019-05-12

Stand by your pipe

A magnet, some line and a boathook hauled this out of the lake after six months. Cleaned up nicely, no?
As the departure date approaches, and, as the last post suggested, the paying work has more or less ceased, boat work has taken on a near-daily rhythm. I say "near" because there are still calls on my time for peripheral concerns, like our out-of-town rental property.
My brother-in-law tacking down the flashing on the roof vent on the last day of March. It's been a fairly harsh spring.
The day before our new tenants were to move in, the next-door neighbours contacted us and said "I think the flashing coming off your roof and is maybe letting snow and rain in."

Talk about motivation.

Myself and my brother-in-law skedaddled eastward, drill sets and fasteners in hand. As it turns out, the flashing was actually aluminum soffit lengths under a wooden, full-length "cap" over a roof vent. Water couldn't actually get in, but we repaired it nonetheless as I wanted to make things right for the new tenants, who are now settling in.
They look heavy, and weigh more.
Meanwhile, back on the still-cradled boat (circa the start of April), I had to remove the six L-16 batteries in order to access the standpipe, which brings water from the outside of the hull to, respectively, the raw-water cooling side of the engine, the head, the air-conditioning/heat pump circuit, and, in the near-future, the watermaker we hope to install in Halifax.
Note the relatively short threads on the nipples.
I discussed after haulout last fall with Andrew Barlow, pal and fabricator/welder extraordinaire, the possibility of replicating the original standpipe of Alchemy in favour of something a) in stainless steel and b) threaded in NPS to take Marelon or equivalent ball valves, as we did with the galley and head sink drains.
Creative carving was required in order to access the various sides of the standpipe. This is inside the galley cabinetry.
Andrew indicated he was up for the job, despite the tricksy time he had in the past getting the NPS threaded nipples cut on a lathe. Despite the fact that NPS, which needs pipe dope or Teflon tape (or both) to be sealed as it is not sealed via a tapering thread, is quite common, apparently you need to know some kind of handshake to have a set of NPS dies.
Four really expensive valves, one pipe. Behold the logic of "fewer holes in boat, happier skipper".
The two leading manufacturers of plastic-type (as opposed to metal) ball valves are U.S.-based Forespar and New Zealand-made TruDesign, the latter being the newer entry in this rather rarefied field of yacht plumbing. The rationale is that plastic valves neither corrode nor are subject to galvanic corrosion, evidence of which I found in the replaced drain nipples and in the old standpipe. Both had bronze ball valves on mild steel nipples.
The dry fitting is a good way to see if you're going to have problems. The Tru-Designs went on precisely.
I opted for TruDesign because last year's Marelon ball valves leaked slightly and spun on with some reluctance. We were able to get them to work, but the 3/4" I.D. ball valves I obtained from Defender Marine seemed to bind in the NPS threads. A phone call to Forespar confirmed that they used "only NPS", which was the whole reason I had to go that route in the first place. Nonetheless, I did not feel confident about such a mission-critical component (all the water-inlet nipples are well below the waterline, of course) making me anxious, so I got four TruDesign ball valves.
Occasionally, I plot my next moves on the foredeck when hauled out. Visionary requires visions.
 I now have spares. That's OK. With water tankage and a water maker to come, I'll use them.
Sparky!
Having cleared the space, cut the needed access, and assured sufficient power, I watched as Andrew wielded his grinder in the tight quarter. Apparently, yoga keeps him flexible.
Further inspection of the old standpipe suggested replacement to avoid failure was a "sooner rather than later" situation.
The hole left down in the hull was interesting because it's the smallest possible amount of wood I could remove to allow Andrew room sufficient to weld the new standpipe in place. Those black hoses are fuel lines from the forward and aft keel tanks. This whole area is usually beneath the batteries and (of late) companionway stairs.
The abyss.
 The sight of Andrew welding a structural "doubler" on the outside of the hull was...interesting.
Not seen: A fire extinguisher at the ready
Of note is the positive shut-off. When working on the batteries, I typically turn off the charger at the panel, the main switch and both the positive and negative disconnects.
That area, once completed, was painted by Mrs. Alchemy
 The welding went well, I thought. By "well", I mean "we didn't sink when launched".
It's warm work down there.
I had to cut a little notch for the lowest nipple (the engine raw-water inlet). No biggie: I have a useful Fein Multimaster knock-off I've brutalized for years. Still works and cost me $99! 
Note the depth of the threads. I wanted maximum contact.
The picture shows the nipple covered in Teflon tape. I also used pipe dope, aka "joint compound" or "pipe paste". I use it sparingly and it coats the threads both on the valve and the nipple. Absent the sort of gasket a garden hose possesses (probably the most common object the average person would encounter an NPS thread), the combo seems to do the trick.
I had to orient the handles in different directions and mountings to allow them to work in this proximity.
Spoiler alert: Not a drop. 
Smooth operation. When we haul in Halifax, I'll have it ground down smoother.
This was a big and backbreaking project, but I'm happy we did it. No amount of softwood bungs would do the trick if a pipe nipple crumbled at sea.

2018-05-20

Comms 'n' sea

The baffled cat, "Shadow". Much as I would like to bring her, she's not coming on the voyage. Wouldn't be fair, and likely would be fatal for the cat.
Leading with a cat photo should not only get me some cheaply earned hits, but also suggest I am capable of whimsy. Which is true, but not often when it comes to the boat. However, I'm willing to make an exception when it comes to my cat, who only goes into the entirely wild yard under supervision.
The Vesper XB-8000 AIS transceiver booting up. All the wiring is loose (and the holes in the pilothouse unsealed) until I can route said wiring back into the pilothouse roof, which will be thereafter fastened down to the pilothouse frame for the first time in ages.
I, on the other hand, tend to work solo on the boat. This is because Mrs. Alchemy works at a distant wildlife centre for stupidly protracted hours, particularly in fertile spring, and I work from home upon request as an editor. Which means, in practice, plenty of work some days and bugger off  by 1100h others. That's condusive to boat work, which is why I haven't worked in an office since I got into boating in 1999. Sincerely, what have I missed? Oh, yes: NOTHING.
Had to download some USB drivers, but otherwise, this installation of Vesper Marine's software was a doddle.
Anyway, in a week that saw, as part of our house-sale process, the acquisition of a stackable washer-dryer and the transport of same about three kilometres by hand cart and shoe leather (we lack a car and rarely miss one, save for when we have to do this sort of First/Third World transit), I was able to drill some strategic holes and get both the radar and AIS cabling inside the pilothouse. The cabling is sloppy and excessive because I have yet to decide where to mount the AIS module and the radar display...to think I thought "I wonder if it's big enough?"...damn, it's huge from 45 cm. away.
From marinetraffic.com, evidence that Alchemy can both see and be seen, at least in terms of AIS. And yes, I turn it off when I leave the boat. I actually have no interest in pointing out where I keep my tools.
The AIS setup was pretty straightforward, save for the usual search for the USB drivers and the paranoia surrounding the correct inputting of the MMSI number. However, all went well and, as seen above, we are now transmitting a Class B AIS signal, complete with some related data attached to our MMSI number. Huzzah! I didn't screw up the mast connections!
Boat, as seen from the boat. It's all a little meta, isn't it?
Sure, English, but just this once.
The Furuno 1815 manual and related guidance (note the "quick start" flip cards to the left of the above photo) are excellent, if densely detailed. Because I tend to learn by doing, I will likely take the now rigged-for-sailing boat out tomorrow to play with the radar controls and see what I (literally) see from a few miles south of Toronto.
The first sweep. Of course, inside a basin next to about 300 condos, plus a tree line, it's a dog's breakfast.

The radar is complex in terms of the variety of tunings, ranges, guard rings, and display options, but not dauntingly so, and on first glance it seems very much what the skipper ordered. What remains to be done is linking the plotter via a to-be-purchased NMEA 2000 patch cord to the AIS unit, so that AIS targets (and their calculated distance away) are visible on the plotter. I may also link via the secondary NMEA 0183 wiring the radar to the AIS, so I can have AIS information available on the radar screen. What I won't likely do is have radar "layover" on the plotter...I think that would be visually too distracting and I want to keep radar church and plotter state separate for now. Still, a good few days' work.


2017-09-14

Well, that was an eventful month

Warning: This post is both multi-topical and heavy with photos.

Well, I haven't posted for a month, which is historically unusual. This was due to a series of events both fortunate and unfortunate. We went in mid-August twice for a few days away, which in this case involved visiting both friends in Frenchman's Bay and a trip across the lake to visit for the first time the scenic, if tourist-ridden town, of Niagara-on-the-Lake.

Frenchman's Bay was fun, if blustery. As seen above, we aren't usually subject to heel at dock, and a fender sacrificed itself on behalf of our paintjob. Crewman Lucas experienced warm if near-oceanic waves, and the lake ate his foolishly-taken-swimming sunglasses.
The next one ate his shades.
The trip back was fine, if (typical of Lake Ontario) the motor was needed were we to get back in time for dinner. I noticed I had passed the 25 hour engine run time mark, and realized I was supposed to change the transmission fluid for the first time. This wasn't recorded photographically, as it was mucky and I needed a third arm. About a litre of ATF (which looked brand-new) missed the bucket and ended up in the aft bilge. This will become important information later.
To the east of Toronto is a long artificial "spit" that's become quite a nature refuge. Also, it means a long diversion to the SW to get back into the harbour.
The high water May-end of July has receded from the club, but that hasn't discourged some unusual visitors. As I am frequently on the boat at odd times, like "middle of the weekdays" depending on my workflow, I see quite a bit of local wildlife not present at busier times. I think this fellow was a witness to the day I put in the new anchor.
Egrets, I've had a few.
A recent mid-week job was the addition of a keyed lock to the companionway door. Yes, I can see the slight gap between frame and lid. It's an easy fix that will happen over the winter. The point is that this door is now somewhat harder to break through.

I mean, a crowbar and a chain clipper will still do the job, but this is meant to discourage, not prevent.

Another trip on the weekend of the recently solar eclipse (70% partial over Lake Ontario) brought us to Niagara-on-the-Lake. We were told we were very lucky in our timing to get a spot on their wall as they were still in "recovery mode" from extensive flooding that had delayed their launch until late July. Their boatyard was still pretty full, suggesting that some people had just given up on the year, which was sad.

Evidence of damage was all over the place, as was evidence of circa four-knot current in the Niagara River. I made good use of our new sounder, and better use of the throttle. I wish I had been clearer on the "don't enter the docks area" warning, however, as it was a very tight turn or three to get out after I learned I was meant to go on the wall (bow to current). But we docked easily and had a good time in town and at the beach.

I'm just guessing here that the bottom drops off like a cliff right behind him. Just to the left are about three sailboats that were rafted up on an anchor, evidence of a big counter-current as they were pointed to the north shore.
The Monday of the eclipse was nearly calm and dead useless for sailing, but quite good for sextant work. The general effect of a partial eclipse (I've been under a few) is like high cirrus cloud: a generalized dimming, but there's no evidence of the moon's "bite" if you glance at it. That takes binoculars!

It begins!
What I choose to call "total partiality".
Lucas, after most reluctantly taking the wheel, because we have yet to install an autopilot and he is even less keen on helming than Mrs. Alchemy, took a break from that "torture" to wield his mother's sextant and check out the progress of the moon.
Sure, welder's glass is cheaper, but not nearly as seamanlike.
Now, during the voyage, the galley drains were acting up a bit and, well, not draining. We weren't sailing and therefore couldn't heel, and I wasn't sure if there was debris in there. In addition, there was a stuck inline valve of this type under the sink as well that wouldn't close. We got back and figuring it out went on the list of "things to check out and/or repair."
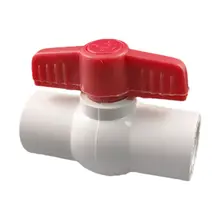
Like this and, upon reflection, not great for below-the-waterline use.
The next day, my club's Commodore, Don Weston, and myself went to check out the "Blue Barge" for a failure to start. Well, we got it going, all right, but discovered it either has a cracked block or a failed gasket between the manifold and the block. The first one is a lot worse than the second, which I could fix.
This old motor both propels the Blue Barge, which is used to shift the railcar wheel mooring bases in the mooring field, and, via a power take-off, pumps the hydraulics that work the crane (top of photo). It's a beast, but a useful one.

Hey, foreshadowing! No, seriously, this was bad. It's either an annoying fix or a "do we buy a diesel" fix.
I then had a nice lunch and debated going back to the boat for its 50 hour oil change. When I stepped aboard and opened the engine bay hatch. I was pretty shocked to see it largely filled with water. I was equally shocked to see about a foot of water in the salon.

Alchemy was sinking.

You'll have to excuse my lack of interest in recording photographically either the depth of the water or my robotic response to the crisis. The bilge pump was off, because I had spilled some ATF during the process of changing that fluid and didn't want to pollute my club's basin until I could swab it up by hand.

Well, I got over that instantly. The Rule 3700 worked (it was powered off a subpanel still above water I installed earlier in the year) and, despite being about a metre down gamely pump water up the new hose I had installed recently (I don't post every improvement I made, actually) threw it off the boat. I ran to the club office to get an AC powered "crash pump", a residential-grade sump pump and a length of hose we use for boats that have single, non-SS hose clamps in the head. It took about 20 minutes to get the water out of the engine bay sufficiently to reveal the problem: the galley drain through-hull pipe was weeping vigorously.

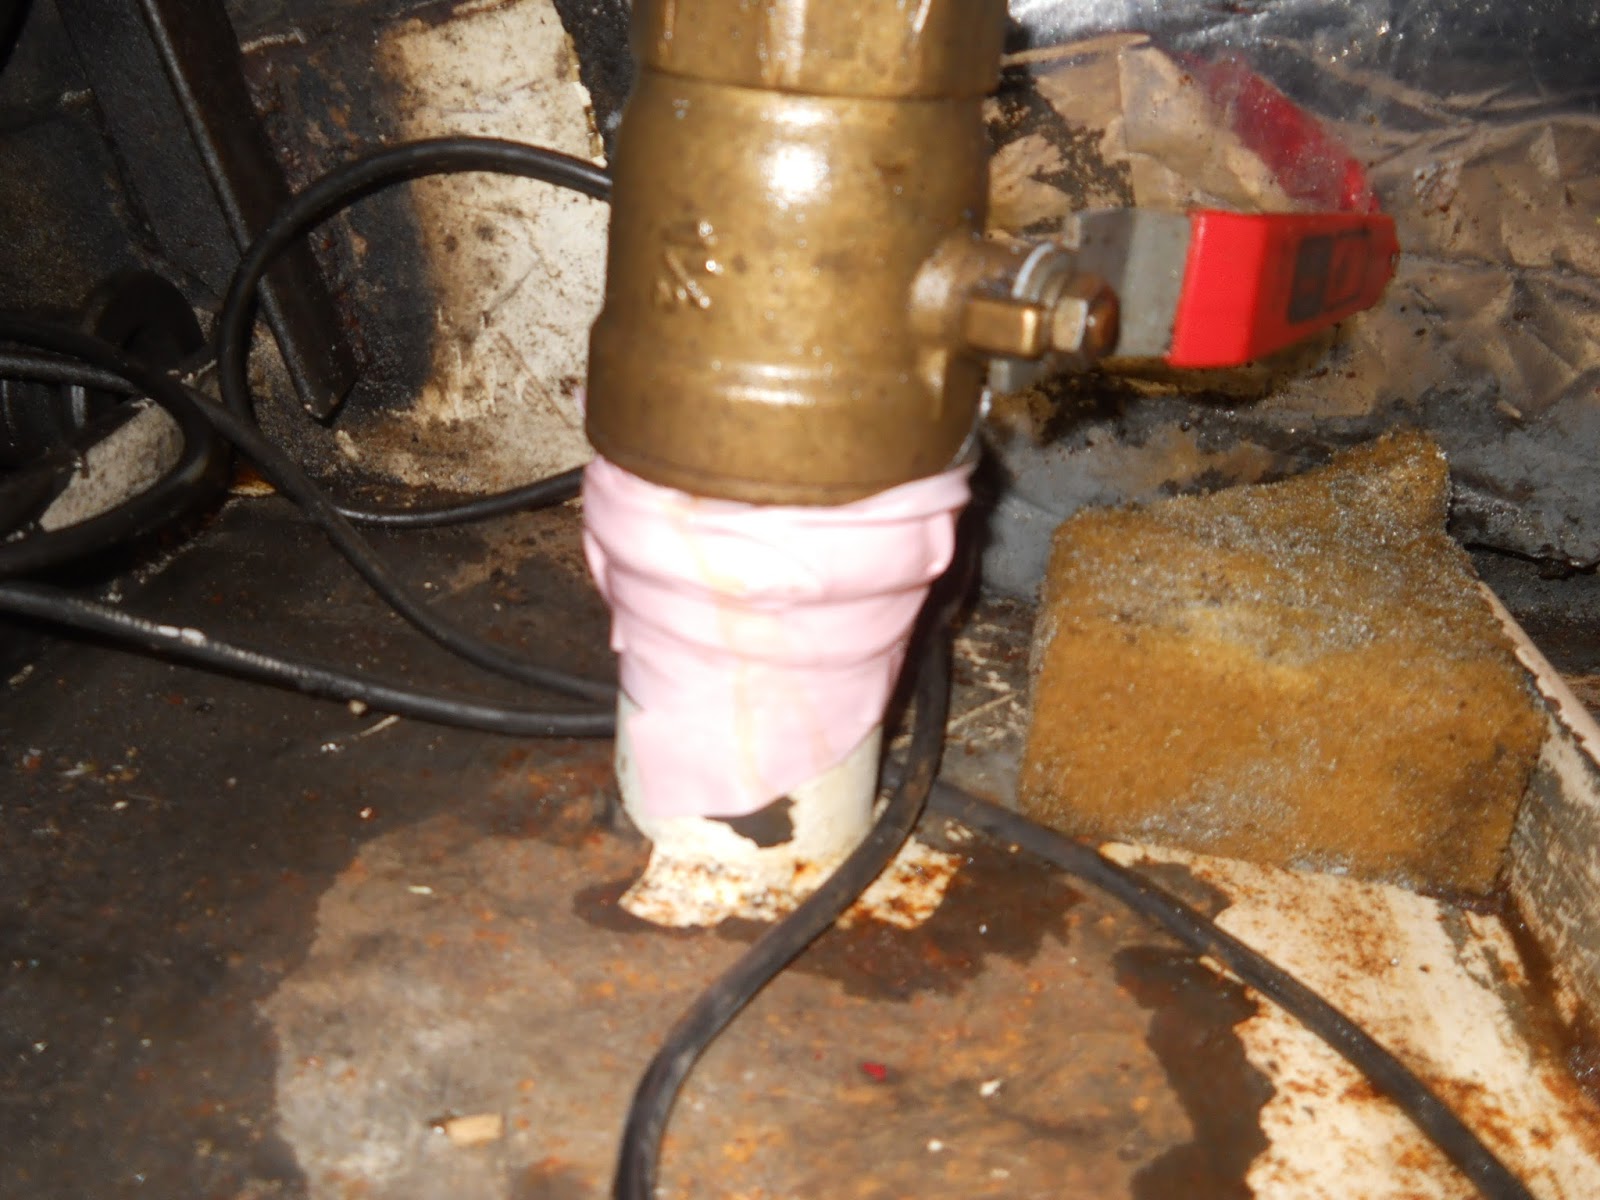
As the "crack" was below the seacock, turning it off was of limited use. Self-amalgamating tape was.

I was able to get down onto the slick stringers and hull and stop the leak with plumber's helper tape, or at least reduce it to a drip. Only then could I survey the damage. That's what's kept us busy since the 21st of August, frankly.
Another shot of Groundwater Zero. Yeah, that's all getting repainted shortly.
Firstly was discerning the cause or causes of the nearly fatal leak. The short answer is I can't tell untill we haul out. I arranged to have that done at Toronto Island Marina and to have a new section of pipe welded on at least this side via Andrew Barton, my fabricator and a fellow member at NYC. But that would have involved a tow as the engine suffered damage and the diesel supply was perhaps compromised. Andrew agreed to do the work (he has a day job on the Island and it would have been convenient for him) but suggested that if the tape was working and haulout was seven (now five) weeks away, I could bung a plug into the thru-hull opening and that and the tape should flood proof the boat until haulout and doing a series of weld jobs with Alchemy cradled.
Secondly, because I cannot at this point remove the seacock, I can't confirm what I suspect is the problem: that the pipe threads supporting the seacock seen above have fractured or otherwise cracked. I am not sure if the mechanical forces of attempting to turn the inline valve imparted a shearing force on the pipe stub; or, after 29 years, there was corrosion and it was just "its time"; or (my initial thought) there might have been galvanic corrosion as the boat next to me had had a jury-rigged garden-grade extension cord going to his race boat that I've found more than once in the water on my port side where this outlet is. I have yet to mount flat zincs directly on the hull and all the anodes are on the prop or the rudder. Clearly, that's moving up the list now.

Frankly, I can't point fingers. It could be a combination. I might not even know when we fix it (and its possibly suspect starboard side drain for the head) after haulout. But I'm paranoid now (and the bilge pump is permanently on "auto", the carp be damned, although most of the goo is out of the bilges now), and I'm down there most days. There's no new ingress of water. In fact, once the mopping up was done, the boat's really dry. Still, I bought one of these for myself and it and 25 feet of hose are at the ready should something of the same nature present itself to me again:
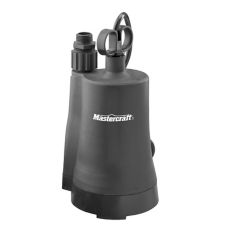
It's merely supplemental. The Rule 3700 can throw three times the amoutn overboard, but it will give me time to think and I can run it off the inverter if I must.
The Commodore is also keen on not seeing members' boats sink: apparently, the paperwork is horrendous, so as he had a few dive jobs scheduled, I offered to crew and he graciously offered to bung the offending pipe. The hope is that "bung plus tape plus vigilance" will keep us afloat until more permanent and presumably stronger steps can be taken.
Note the ramp and the diving ladder. The Commodore picked these attributes and they are damned handy.
The club's able workboat, Storm King, was lashed aside in the late morning (best light for this job). I  gave directions as to which hole to bung. I had purchased a special foam bung as seen on the right. Id clipped the end as I knew the interior diameter was 1.5 inches, but Don reported that too much of it would protrude to guarantee it would stay put. So that was put aside and a more traditional "tapered softwood bung" (on the left) was given to him. This was smacked into place and, I hope, will do the trick.
A tale of two bungs. Really, I think the one on the right is better pushing into a hole from the inside than the other way around.
Diving for bungs is less romantic than diving for pearls, and there's no use wearing nice shoes on a greasy boat.

The list of what was damaged is sort of good news, bad news: The new depthsounder is fine, but the starter motor was fried and gave only the "click/hum of death" when keyed. More on that below. Mercifully, the battery boxes worked as designed and the house bank was untouched by water. The interior carpet was wrecked (except for the head sole, which never got wet) and is gone. And the Nova Kool refrigeration compressor, a Danfoss BF35 unit, got wet and is non-functional. But really, these problems are dozens of hours and hundreds of dollars, not "fetch the salvage barge". It could have been much worse. Like "hurricane hole" worse.

What worse looks like.
As I had mentioned, I was on a mission when I discovered the flooding to change the oil as I had surpassed by six hours the recommended initial change interval of 50 hours. Well, I expected to find a 'grey milkshake' of watery oil and perhaps a need to do several kerosene flushes, as I had been done this road, sadly, before with a duff waterlift with the old Westerbeke W-52 engine pre-2011. But it appears that my new diesel's gaskets are still tight, because the "used" 50 hour crankcase oill was the colour of night, as it should have been. There was zero evidence of water. Same for the transmission fluid. In these respects, we got very lucky.
Healthy and black. The next oil change isn't until 350 hours on the clock. That's probably going to be in Halifax.
Back to the starter. The corrosion seen here was also evident on the starter battery and its associated cabling and fuses, some of which I can likely salvage. The battery was fully submerged, yet when I took it off the boat yesterday (we are going for a full paint job down there before water tanks go in), it still read 12.75 VDC. It's old (about six years) and I'm going to scrap it anyway in favour of a different setup; more on that later, but it's still impressive to me that it didn't completely discharge.


Yeah, not great. The good news was that I cut back that cable and the interior was perfect, suggesting that my power lug crimping and heatshrinking technique is pretty waterproof.
Back at the block, I took the starter off and figured out my next steps. As I found with July's farcical filter fiasco, it pays to do one's research. I learned a great deal about this starter: it's a common 12 VDC, 2KW nine-toothed CW starter used in a variety of Beta Marine diesels, namely the 43, 50 and 60 HP models. Meaning also that it's used in a variety of Kubota backhoes, diggers and tractors.

Now, I checked out the prices for this item from the English Beta Marine site. It goes for £164.95, or about $270 Canadian. Ouch. Still, she doesn't spin without it, which is a case for decompression levers, I suppose.
As above, so blown: That wire and plug is a 40 amp circuit going to the wiring harness and then to the key on the panel

So my first and somewhat cynical stop was the nearest Beta Marine parts dealer, Craig Morley, who advised me that as he would just have to order the thing from the main Beta parts dealer in Canada, out in British Columbia, I would do better to source it locally via a Kubota dealer. Thanks, Craig. You could have just sold me one and cost me a lot of money. You just went to first place in my "surveyor" list.

Just to cover my bases, however, I phoned B.C. and got a price for this Beta starter, which is actually a Kubota starter, which is actually a Denso starter. I was quoted a price of $1,700 Canadian. Plus shipping and this is a fairly chunky item. Yikes.
Before opening this up, I realized someone had been a touch lazy with the "Betatastic" paint job.

I called a Kubota dealer out by the airport. I was quoted $701 Canadian. Well, a grand better. Let's keep it up. Meanwhile, I poured out the water and dried off the guts. Craig had suggested the sooner I did that, the more likely I would be able to have it repaired.
The coils and brushes inside were cruddy, but the rest was easily cleaned.


So I did two things: 1) I ordered a new starter, minus the key circuit, which is a small mod, from the States. Cost to me? $264.32 U.S., including shipping. It arrives tomorrow. It will be, once modified, the spare starter and will be bagged and tagged to avoid this in the future. I was going to do that anyway...2) I took the drowned starter to a reputable local starter rebuilder place.

Unusually for my life, this was downtown and not in south Etobicoke or Mississauga. Most convenient!

They turned it around over the weekend, although with a new look; evidently, they paint everything they rebuild. Cost to me? $160 Canadian. Well, well.
NICE!
Being careful, I tried to tighten all the bolts. They were all tight. I am well-pleased.
About 20 minutes of reinstallation later, the engine started. Yay! Of course, because I don't yet know whether there's water in the keel tanks, I stopped the engine right away. But we're back, baby!

As a side task, and because I was swabbing out the forepeak workshop which took on some water via a limber hole I will keep plugged on passage, I emptied much of the forepeak, dried it out, and removed two surplus anchors and about 250 kilos of "trim ballast" in the form of lead shot in thick, taped-up plastic bags. This was orignally in place to keep the bow on its proper lines with a) different engine and b) two 100 gallon water tanks aft of the mast and c) a couple of Trojan T-105s as the house bank. Now there's a new 30 kilo anchor out in front, six L-16s under the mast, loads more tools and stores and the tanks, when they go in, will be smaller (probably about 400 litres over two tanks) plus the weight of a watermaker system. The effect was noticeable. And now my garage has a lot of scrap metal potential.

Having that bobstay/snubber plate proud of the water hasn't happened for some time. I like it.
Now, there is still a lot of trim ballast left in the form of several 50 kilo lead ingots on either side of the collision bulkhead. Plenty to move around as and if needed, but as I move gear/spares forward and stores lower, they may need further shifting.

The last significant damage was the fridge compressor. I have it disconnected at the moment as I have to replace some wires before I can determine if it just shorted (and I can find the fuse on the PDF I found of its wiring) or is shot.

You can see where the water went: that rusty four-screw terminal is the DC power hookup.
The "muffin fan" is easily replaced, but I have to do yoga to get two hands in here to finish the job. Fingers crossed, because it's a pretty effective unit and if we ran it at more than 2 out of 7, stuff in the fridge section would freeze, even on hot days. Also, they aren't cheap. So we'll see. I think I will reroute the DC supply above the base up that back wall (which is actually part of the bench seating over lockers) and put in an inline fuse suited to the 10 ga. that's supplying the compressor.
Worth saving, I hope.

Thanks for reading this tale of woe mitigated by less woe. This was bad, but not voyage-endangering.