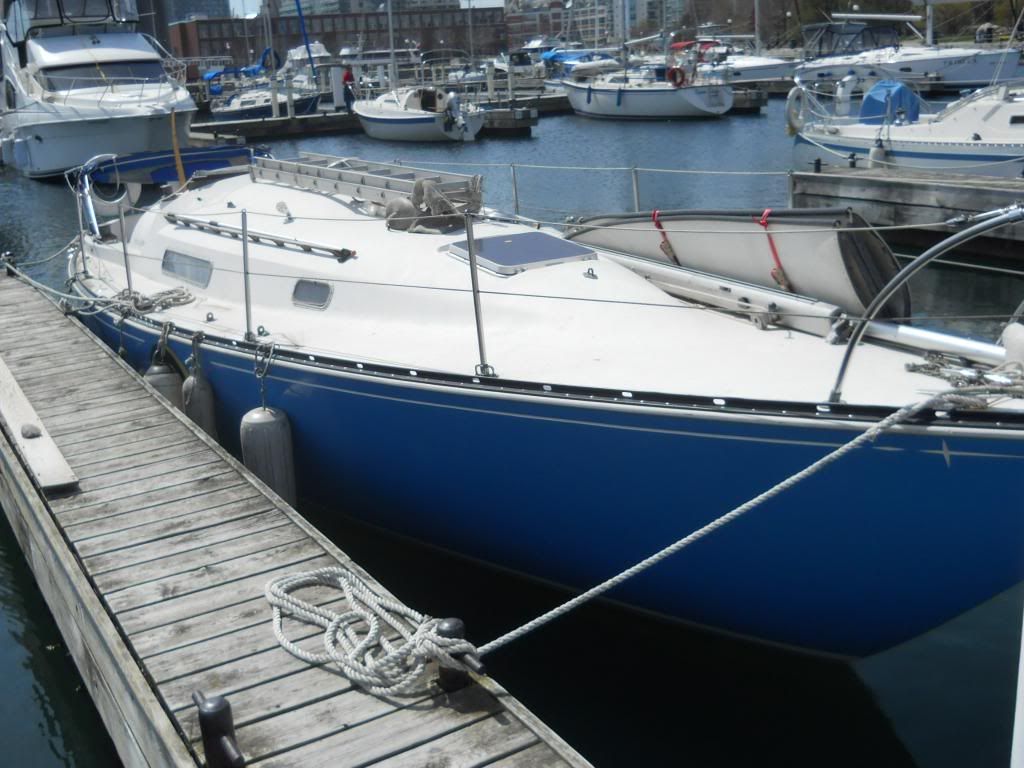
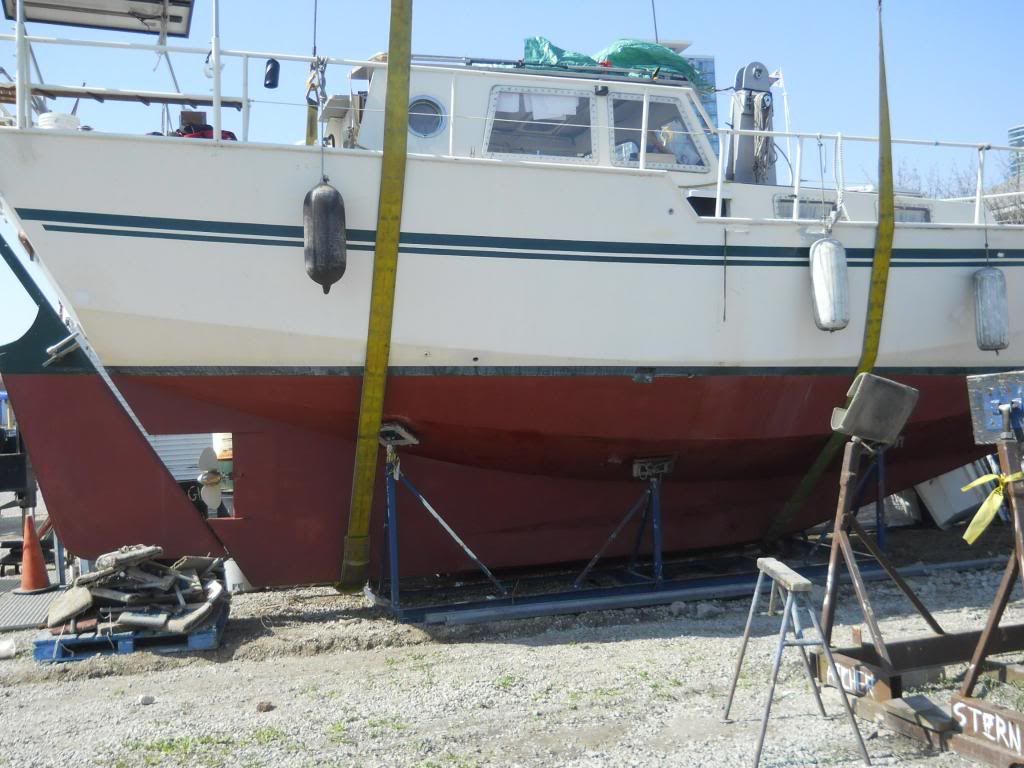
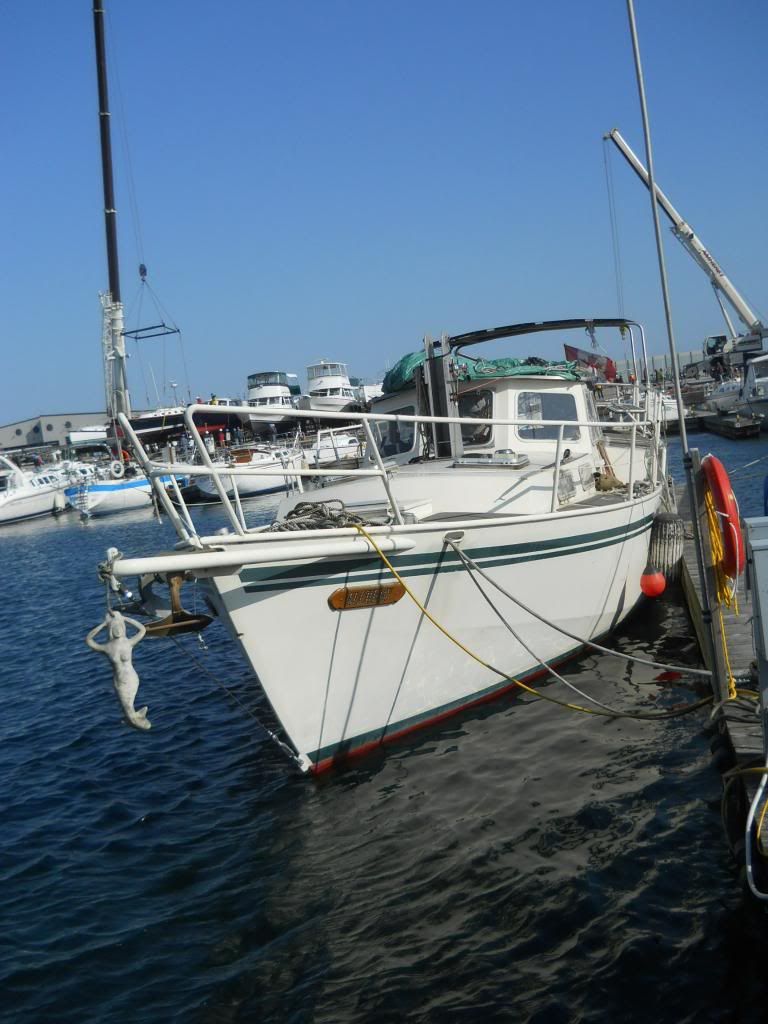
Having established that her new PSS Shaft Seal is, so far, dripless as advetised, I put Alchemy restoration aside last Tuesday to launch Valiente, the other half of my Swiss Navy-sized fleet.
All things considered, not bad for a 40-year-old: a real Boat I Like to Sail
The collision of appalling, barely spring-like weather and its affect on finishing a bunch of needful tasks to make Alchemy watertight for its own launch postponed dealing with Valiente far longer than I had hoped: I could have sailed into our summer berth April 15th instead of 17 days later...hell, the bottom paint was done on April 9th...but I suppose it could be worse: it could be snowing.
An old-school stuffing box will remain on Valiente, as you can't clap a PSS on a direct-drive Atomic 4
Aside from the usual hurry-up-and-wait routine which is to be expected at a busy boat yard in May, boat partner Clive and myself had little in the way of trouble, although his elderly Honda 800 generator blew a fuse trying to power my 10 amp Guest battery charger, and he volunteered to get my Honda 2000 from my house, which involved Toronto traffic so dense that it delayed me on an unloaded bicycle...my offshore readers from this area can feel good about avoiding that downside to an otherwise very nice place to come from. We did the usual last-day-ashore stuff: servicing the thruhulls/seacocks, tightening hose clamps, particularly on hose below the WL, and bringing various chunks (like the Portabote and the boom) out on deck to free up space in the cabin.
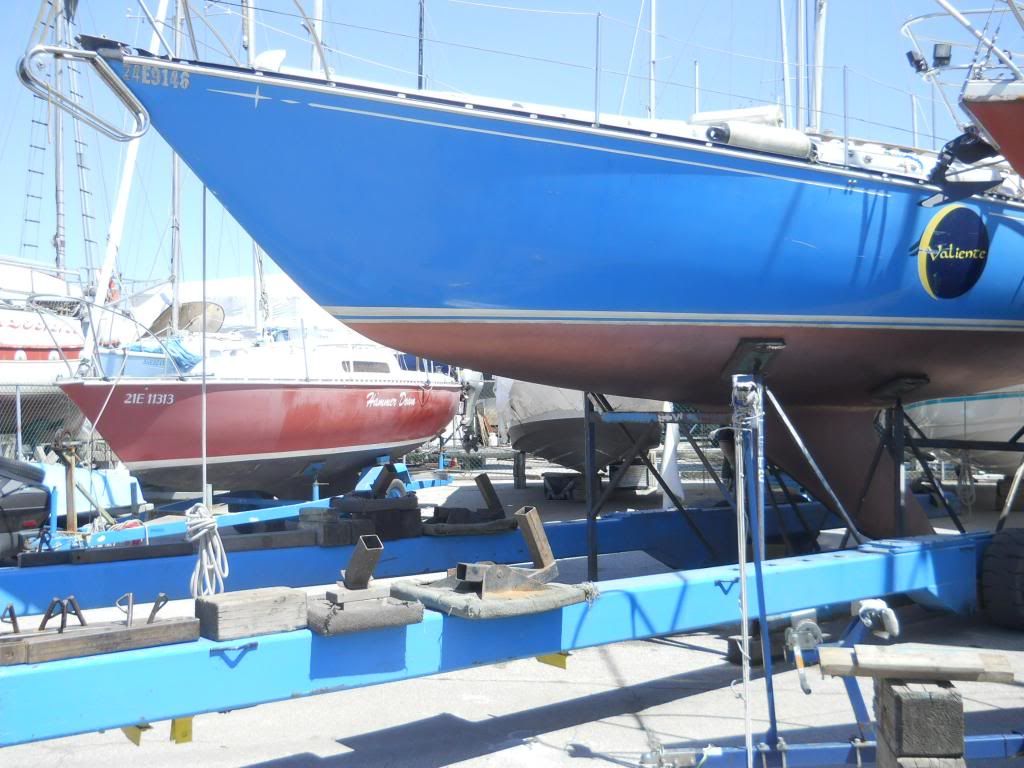
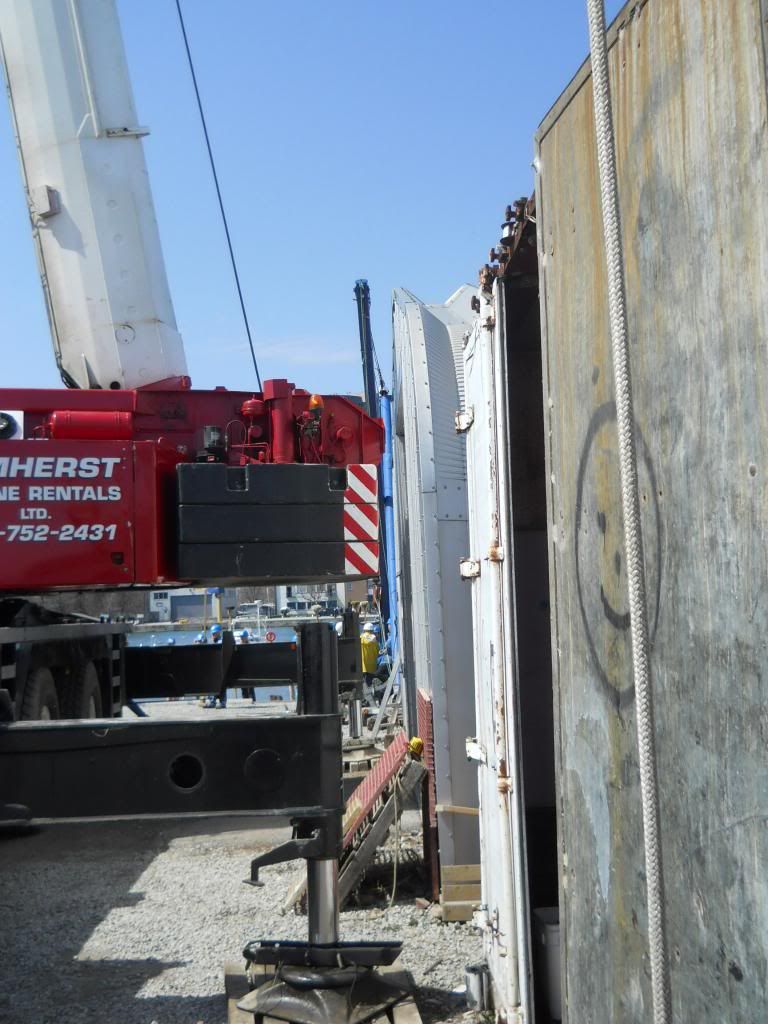
Like threading a ten-ton needle
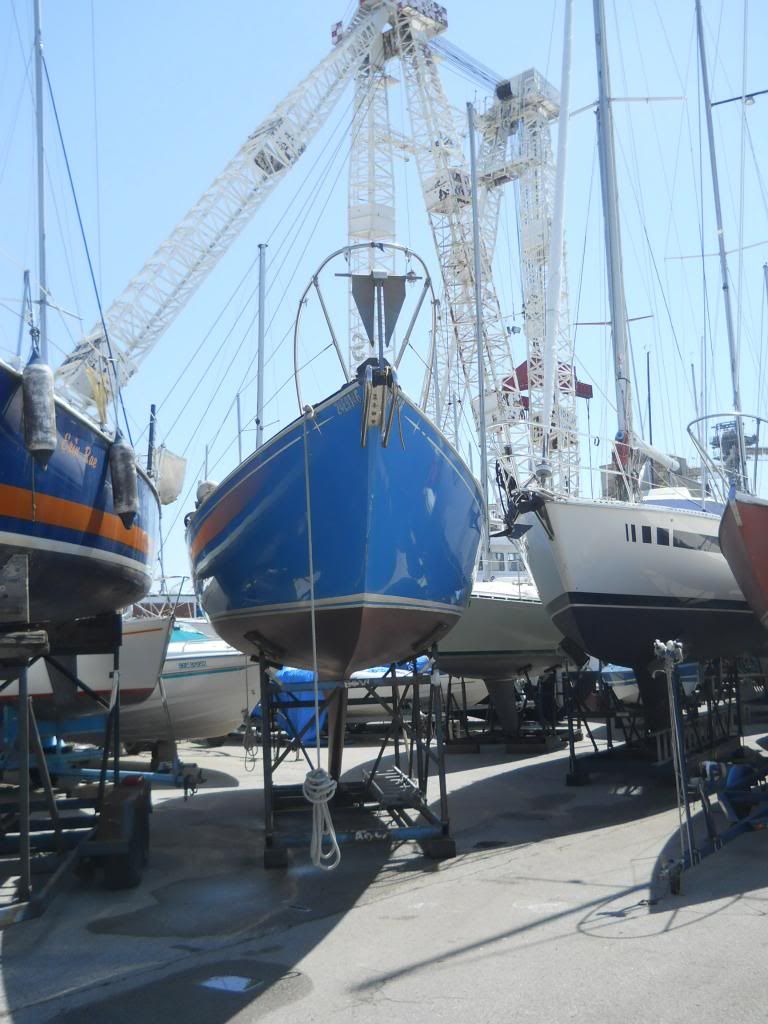
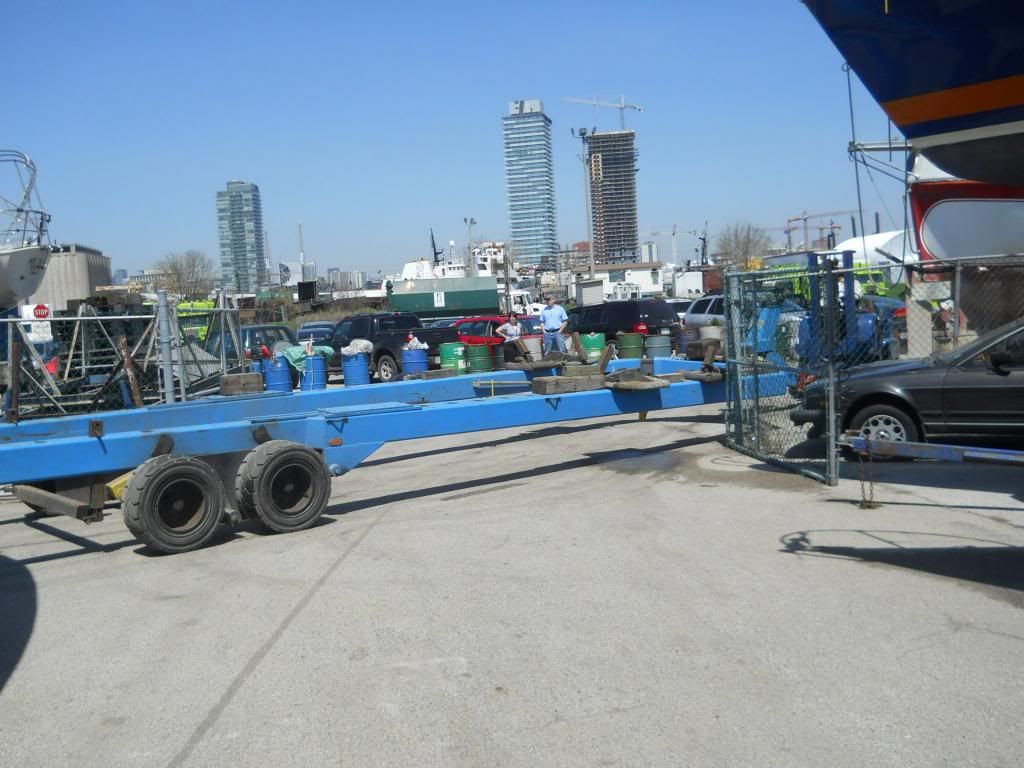
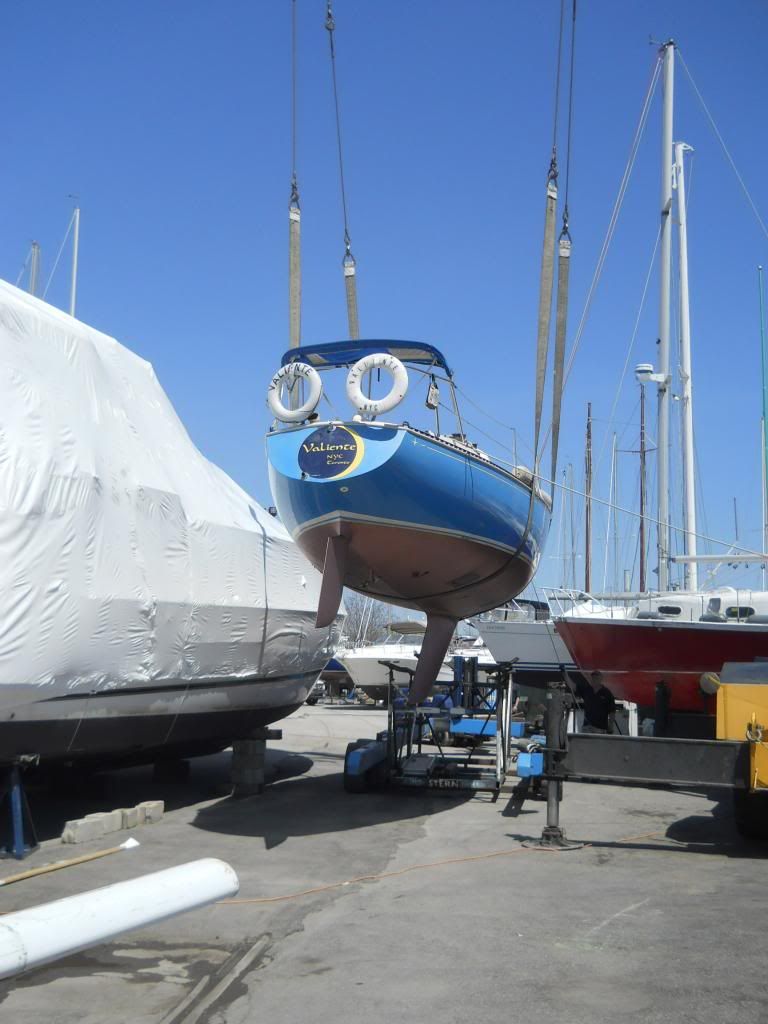
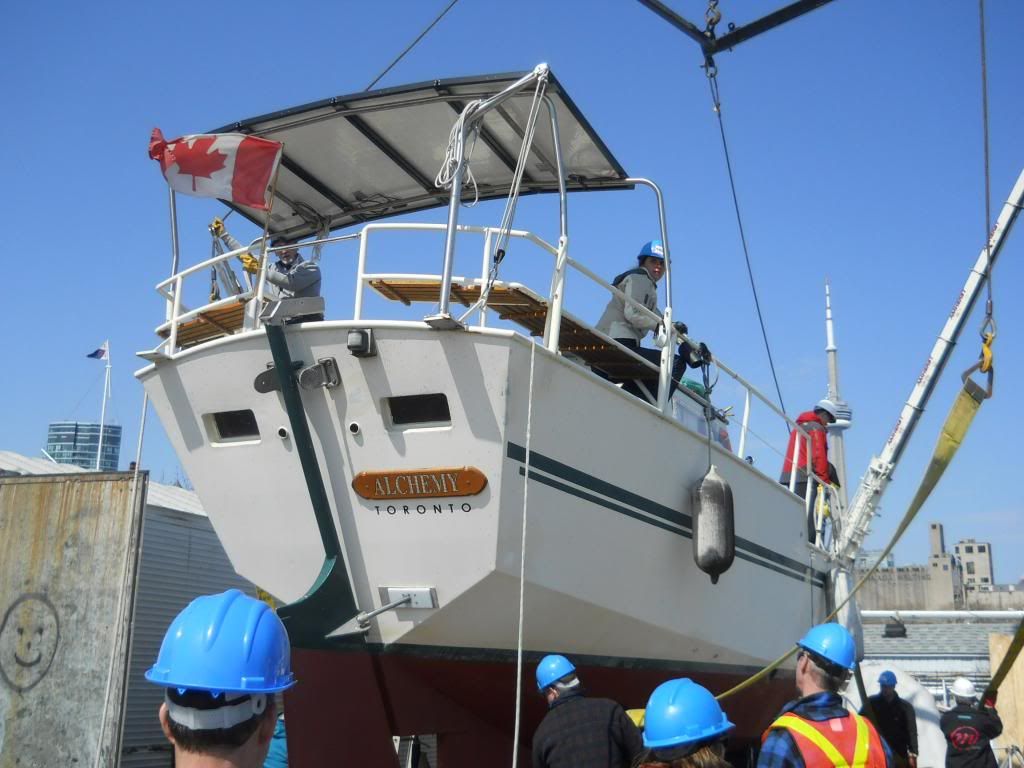
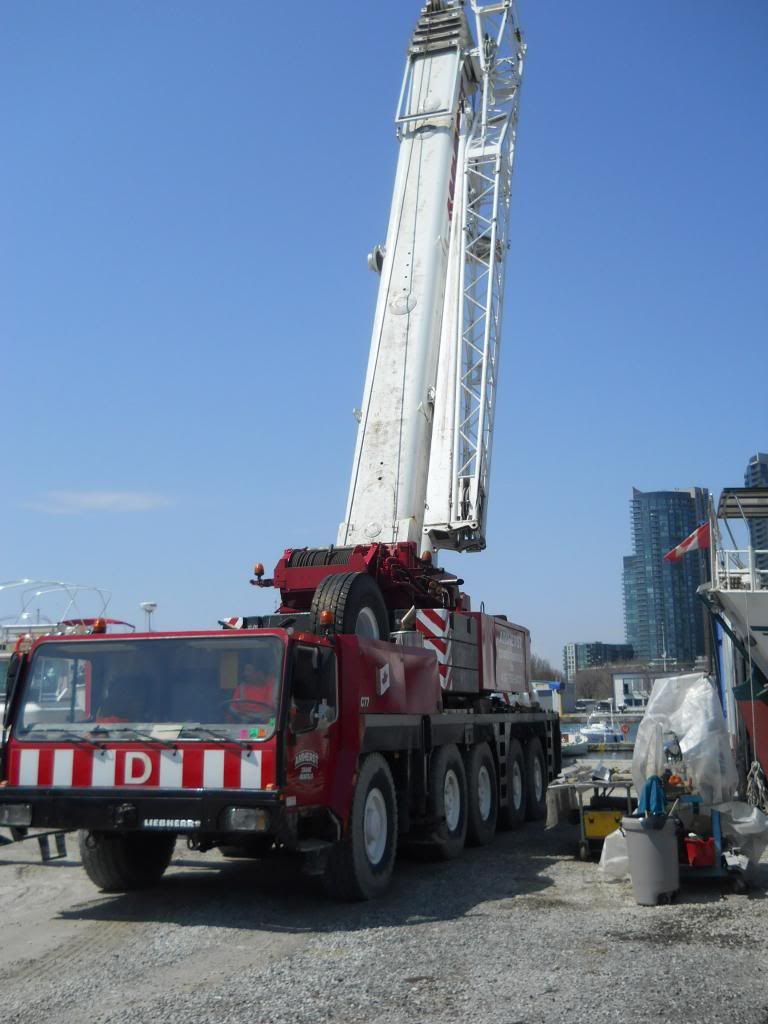
I've posted plenty of launch and haulout pictures in the past, but this time, I have some nice shots of the redoubtable Uli and Clayton maneuvering their impressive gear in what would appear to be extremely close quarters. This rig of hydraulic lift trailer and forklift is about sixty feet or 19 metres in length. From my bow to that gate is about one boat length (35 feet/11 metres). Uli, the yard manager, is driving backwards much of the time and is doing six-point turns...yikes, watching this is a tad nerve-wracking for the uninitiated. I am almost used to it, and Clive, who parks giant passenger jets in narrow airport gates as part of his day job, exhibited frank admiration for the way these guys work efficiently and with clearly well-practised spatial orientation.
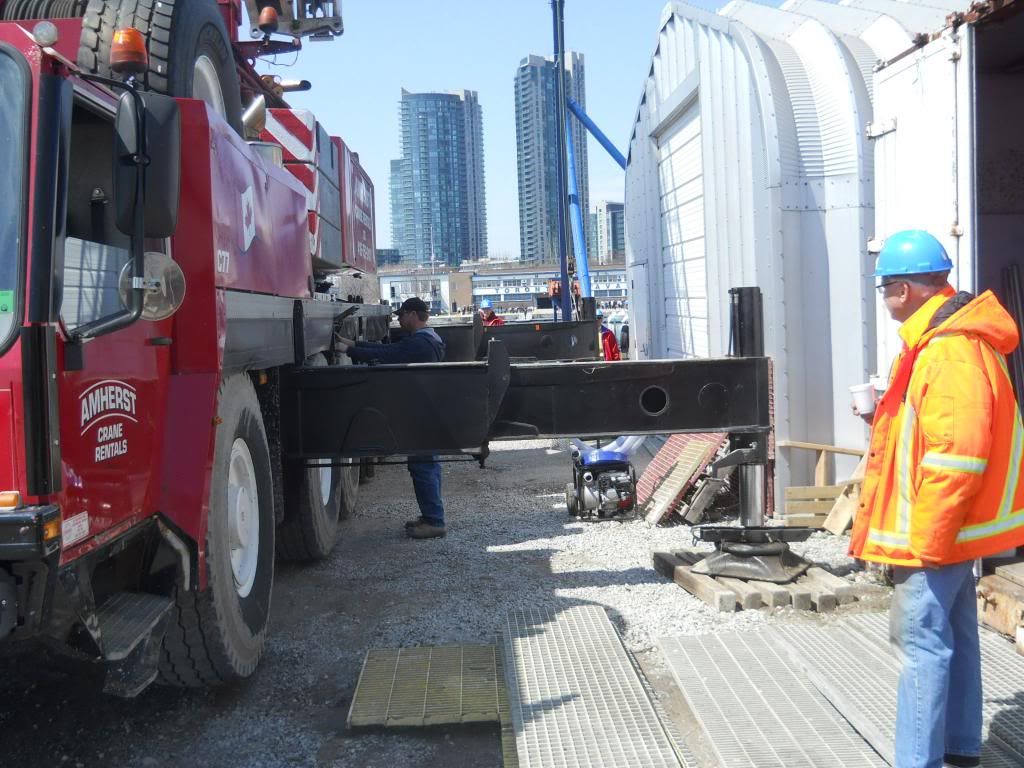
The hydraulics are pressurized by yet another small Honda motor. It looks like it's off a lawnmower.
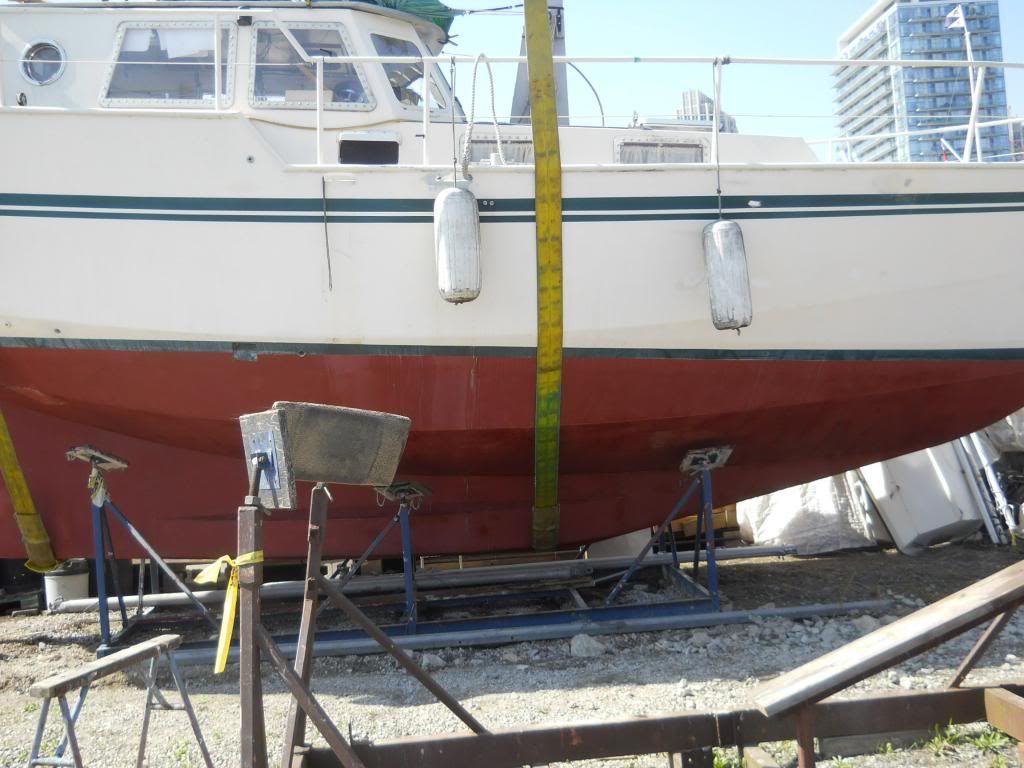
The entire cradle is raised off cinder blocks, only a few inches or so, and is pulled free.
And that's why I don't lower the fenders.
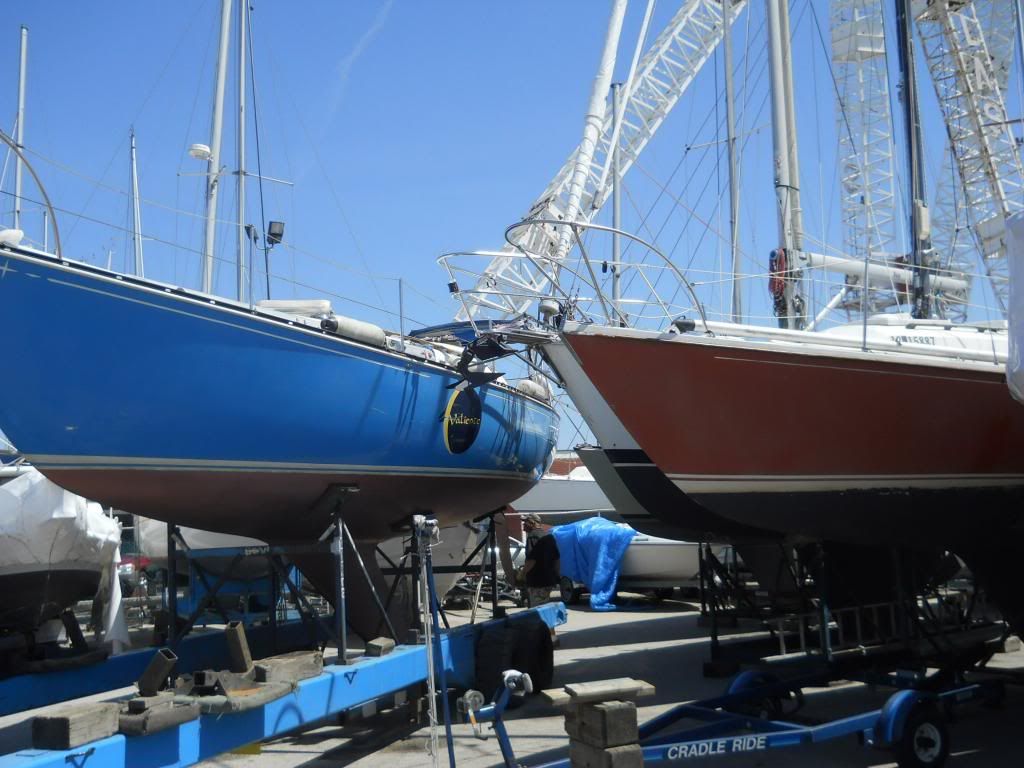
Here you can just make out that the pulpit of one boat is brushing at my aft port lifering as Valiente is hauled out of the crowd. It is not an exaggeration to say I've seen boats pass within one inch/2.5 cm of each other. The economics of boat storage depend on close quartering.
Not seen: The wind had picked up a bit and my stern swung alarmingly close to that shrink-wrap
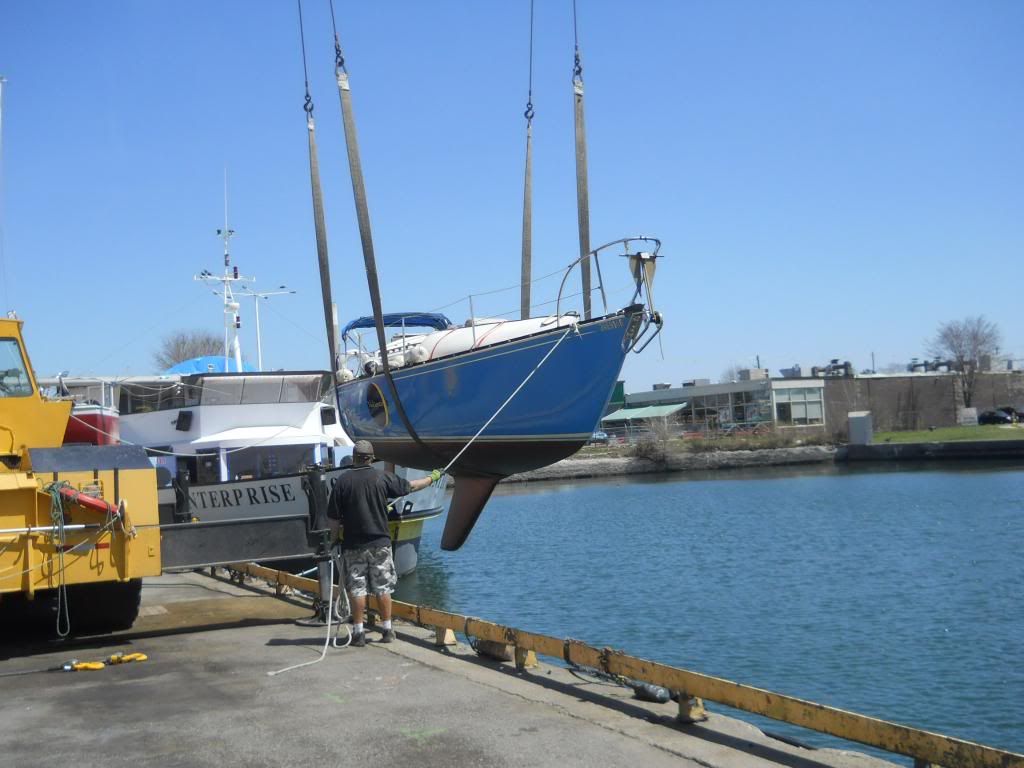
After a ten-minute trundle around the outside of the ill-defined boat-stowage grounds, it was up, up and away time into a blue sky rarely seen this year until the last week or so.
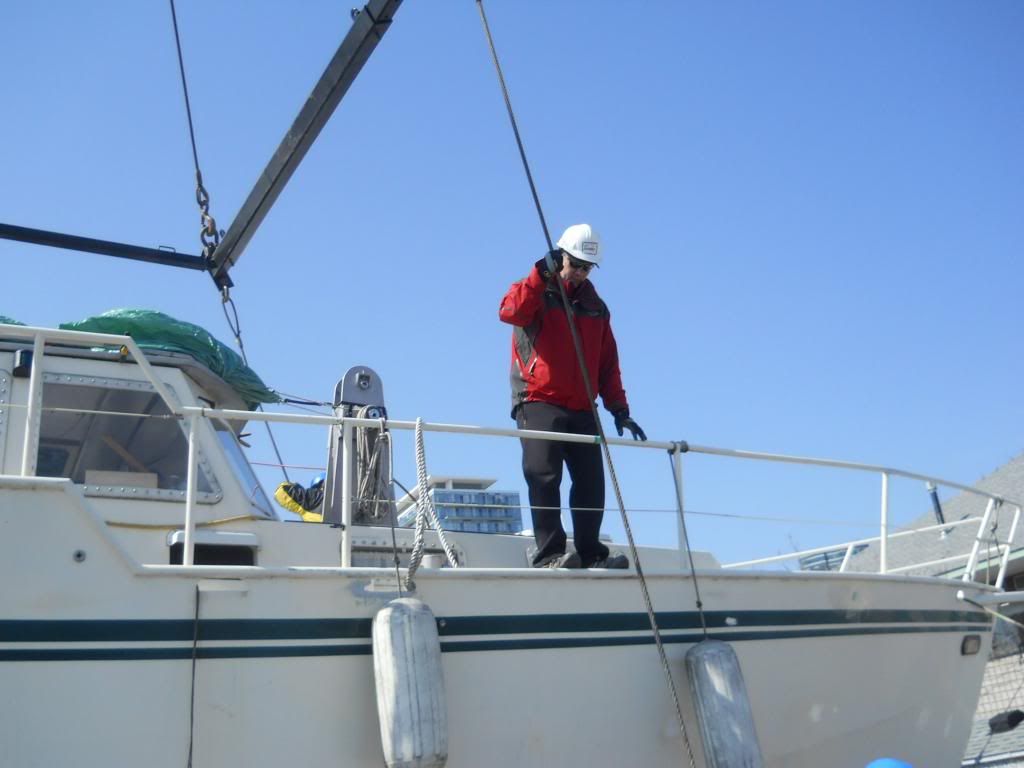
The first duty...look for water coming in where it shoudn't be.
The engine started right away, although it stalled briefly when put in gear. There was an annoying and fairly significant leak from the newly replaced basket filter to which I attribute a poorly seated gasket ring. Throw in the anticipated dripping from the stuffing box, which tends to need a few days immersed to swell to its nominal "slow drip" state, and I am glad I had the bilge pump in working order. By the time I tied up after a 20 minute chug across the harbour, there were a few dozen litres below.
That ladder will be shortly replaced by a mast
Not a worry, however. I fixed the basket leak and tightened the stuffing box a little until it settles. We'll see if both remedies work the next time I motor, which will be to put the mast in next week.
UPDATE, 2013.05.10: Having used this crimper a fair bit now, I realized that it's important to adjust the little +/- adjustment cog on the side. I had mine too much to the "plus" side, meaning I had to bear down really hard (and I am not a lightly built, stringy individual) in order to get that final "click" of the rachet mechanism that would release the crimp. I found a few notches back gave an equally serviceable crimp (visible as practically solid stranded copper in the middle of the crimp) that I could finish with one hand, and not with a three-pound mallet strike. Still haven't figured out the "release lever", but that doesn't solve the problem of a crimp setting that requires a gorilla's grip.
A bit tinny, resolution-wise
I was schooled (remotely) in the art and science of marine-wire crimping by a character known only as MaineSail, a guy who is like a one-man Practical Sailor of demonstrably good advice and real-world testing on boat repair techniques and products. This photographic tutorial, plus the premature failure of a couple of my own crimps, made me think I needed not only the right tools, but the right techniques to create reliable, strong, and corrosion-resistant crimps.
I am guilty, your lordship, but I promise to do better in the future.
Those interested in the details are encouraged to read MaineSail's excellent treatise, but the gist is this: Marine wire is tinned copper, which resists corrosion, making it last longer (but not forever!) in the terminally damp (pun intended) marine environment of salt air and inevitable splashing. You therefore want tinned connectors.
This fellow gives an introduction:
A second factor is strain relief. A properly crimped connector can support a surprising amount of weight and belies the old idea that twisting a couple of wire ends together and soldering it over (to be followed by a few wraps of Grandpa's best roll of black electrical tape) will suffice.
A third element is accurate wire stripping. That involves not the home handyman's method of running a pocketknife around the wire and then pulling off the insulation layer with one's teeth...yes, we've all done that...but by using a tool with dies (are we sensing a pattern here?)
Insert "I've known a lot of strippers in my time, but..." joke here.
This is the Ideal Stripmaster. It handles 10-22AWG wire, sizes that would include the majority of boat electrical work outside of battery lugs and cables, and will strip both stranded (marine standard) and solid (house standard). As is often the case, I found a place near me with no connection, pun suggested, to the sea or boats: an electrician's tool supply place. I find increasingly that my needs for tools and supplies are met by "industrial" concerns and not "boat gear shops". I also find if I do need something definitely marine, I poke around in professional mariners and fishermen's catalogues to find it, rather than chandleries geared toward the recreational sailor. C'est la sea.
Speaking of battery cables and lugs, they are thick and expensive things that not only vary in price with that of copper and tin as commodities, but which carry high enough currents to get seriously hot if poorly crimped or sealed. And I will need a lot of 'em for my house bank and other parts of the fairly complex charging systems I wish to use. Once again, the mind of MaineSail has produced an excellent primer on the topic, and made a case for doing the job correctly by doing it for oneself.
So while many sailors will have heavy crimps made by a shop or a chandlery, I am looking at buying yet another tool to "get 'er done": a hydraulic hand crimping tool:
If I had two 12 VDC batteries that I needed to link to a switch with four or six cables that required crimping with lugs appropriate to Group 27s, I would have a store do it. But I need to do perhaps 20 to 30 8 AWG down to 2/0 AWG crimps of various lugs and high-current conduit connecting L-16s or an equally large form factor of flooded battery, so a tool like this will, in fact, save me money. That's my story, anyway, and I'm sticking to it.
Because boats run electrical power (and increasingly so) in a generally hostile environment, special and generally agreed upon standards constitute best practices. The ABYC documentation (which is similar to that of Transport Canada's rules on boat wiring) on these standards may not be compelling reading unless you've ever had an electrical fire. Nor do they mention the role of anchors in crimp testing. But they do emphasize the strong correlation between a good, tight, moisture-excluding wire crimp and a safer boat where things reliably happen when switches are flipped that don't include a follow-up MAYDAY call. So scrimping on crimping is a false economy.
Today's pictorial is brought courtesy of diesel and gravity.
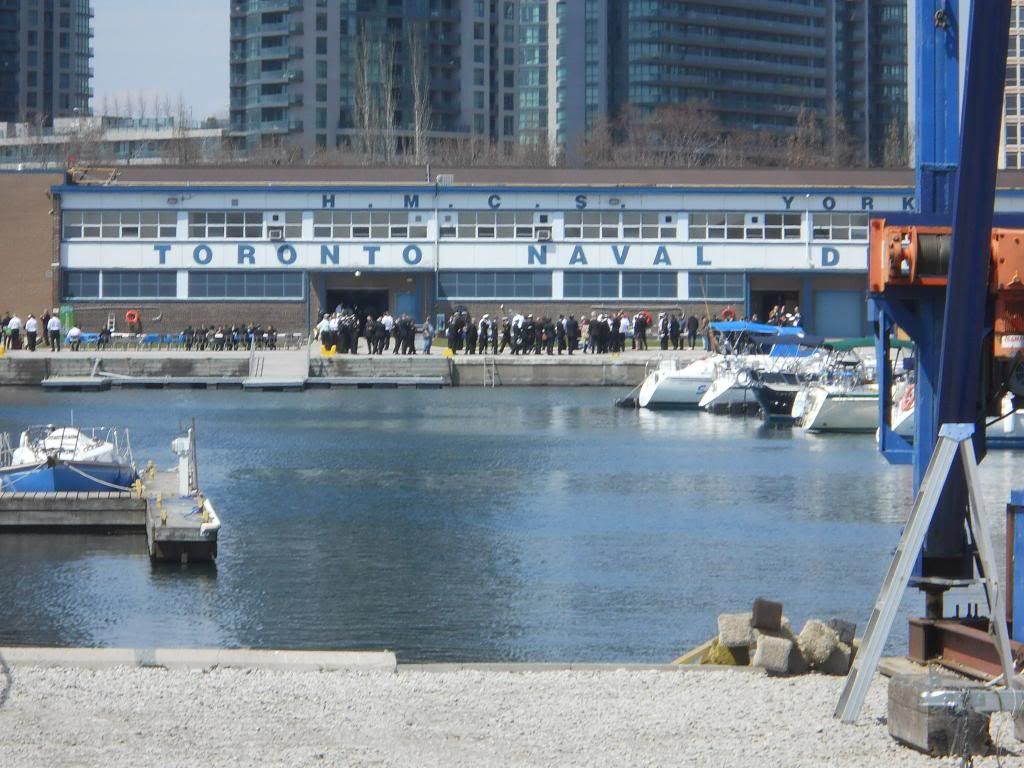
Our boat club's inner basin is shared with a second club and a modest naval base used mainly for the creation of Sea Cadets and marching bands.
A few cheers, sure, but I didn't expect a parade.
Apparently, that old sea dog Prince Philip was in town to do something regimental. It tickles me to think that he somehow looked out the window of the royal limo and spotted Alchemy aloft and later said "I say, Elizabeth, over in the colonies I saw the most astounding flying boat..."
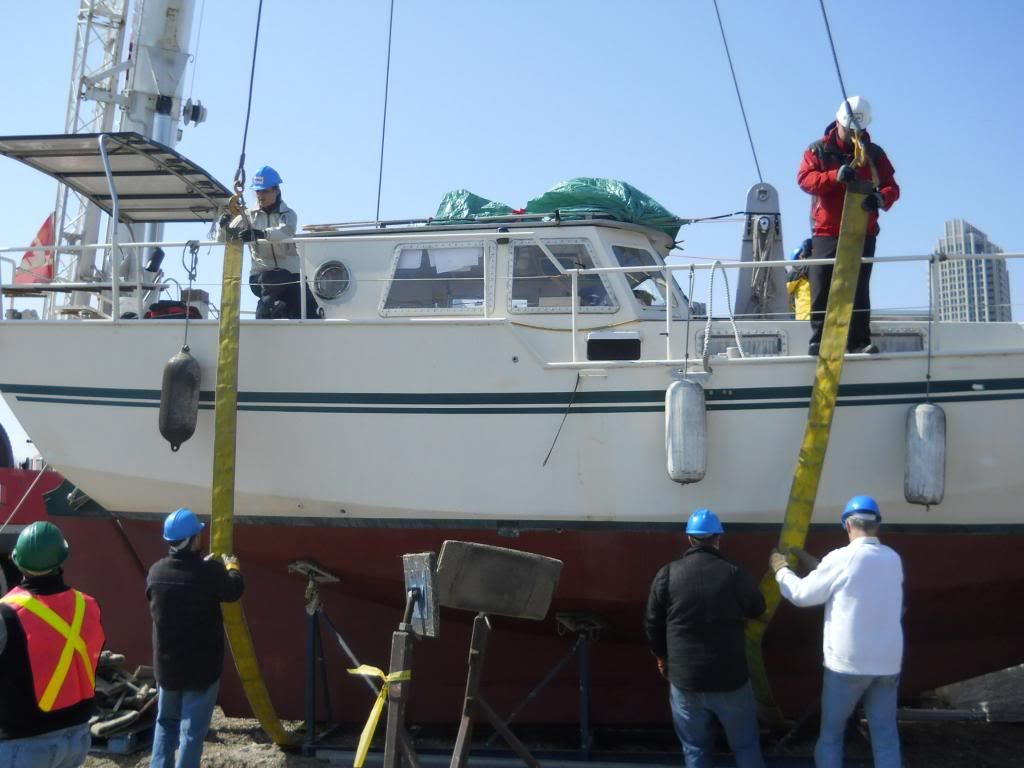
The pre-flight consisted of "slingers" and "linesmen/women" arranging the lifting and pulling items correctly:
The long lines at the quarters are to spin the boat from the ground while it's in the air. Non-trivial labour.
Mrs. Alchemy is the primary painter and appreciates when the finish escapes chipping.
These slings and the hooks and cables to which they are attached weigh a lot and require careful handling.
The crane slated to haul Alchemy's 14 or so tonnes skyward proved to be a snug fit between the remaining boat rows and our forklift shed.
We've used Amherst for some years. They very much know their stuff in a job that doesn't tolerate error.
The bracing legs were extended into gaps between boats and building. Tight fit!
Moving the shed would take some time.
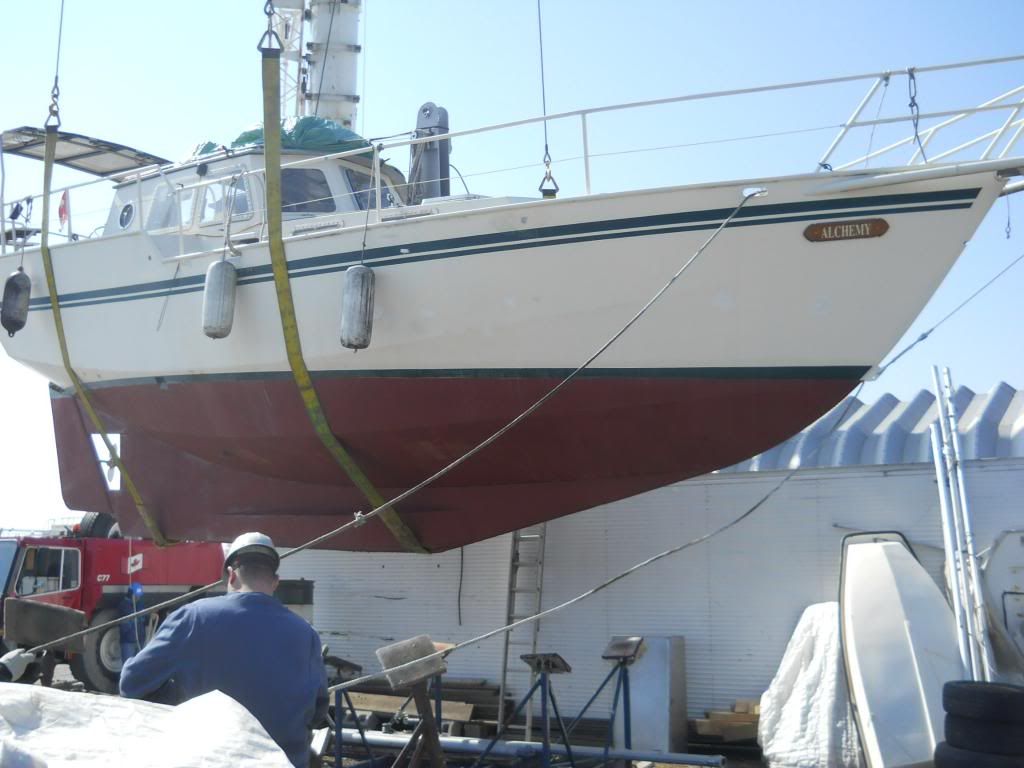
I was a little concerned that a) there was no "cinch belt" used on the slings (the horizontal belt or strap keeps the vertical slings from shifting under load), and b) the forward sling was a little too far aft. These photos seem to suggest I was right as Alchemy takes off in a decidedly bow-down attitude.
The green tape marks on the top rail indicates the preferred sling positions.
On the other hand, having the forward sling right where the keel bottom meets the angle up to the bow was arguably a less "slide-prone" placement.
Nicer fenders are awaiting deployment. Honest.
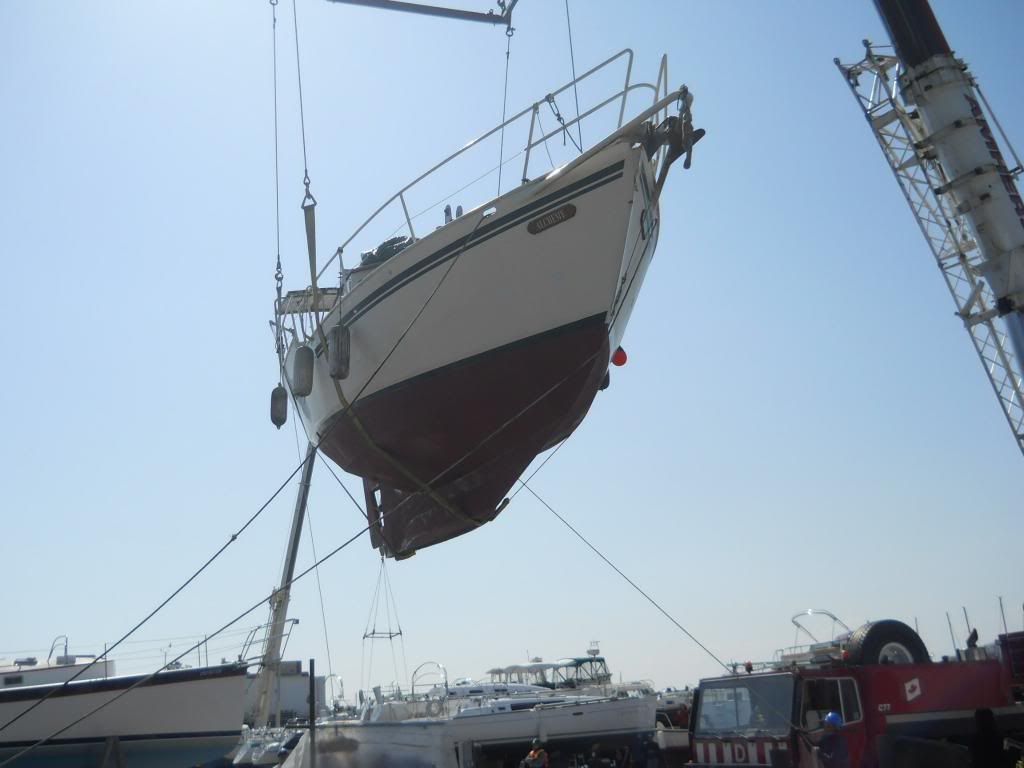
Alchemy looks like some sort of secret U-Boat design here.
This is the part where even a modest breeze can cause trouble.
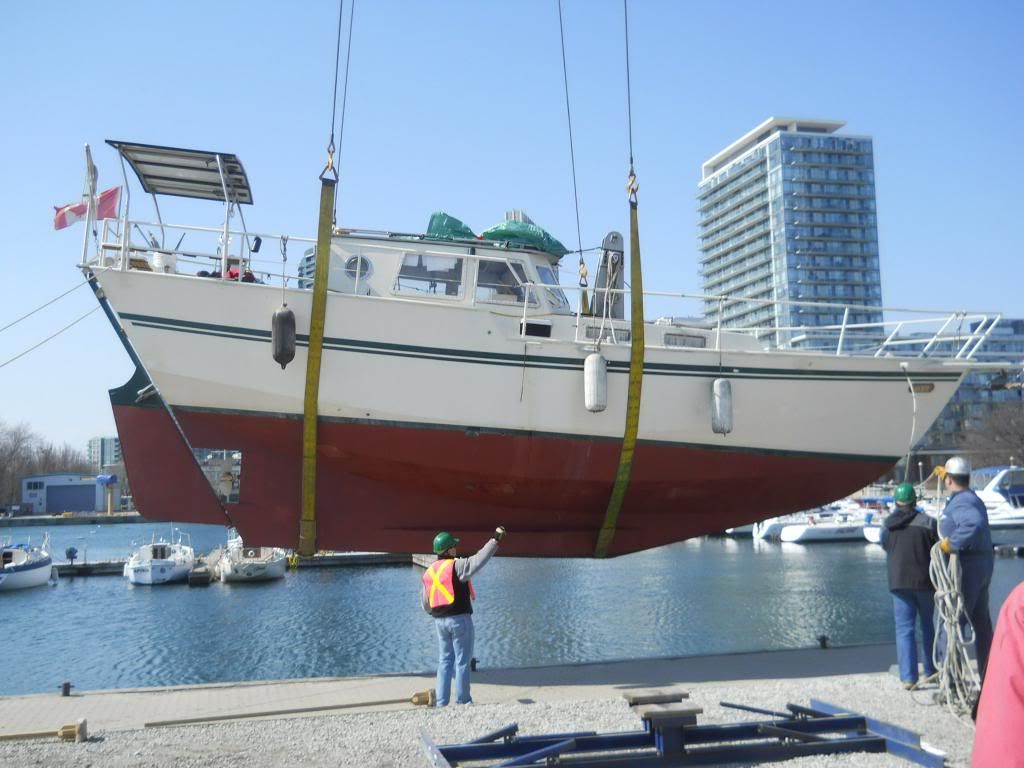
The fellow in the orange vest is actually signalling, not single-handedly lifting our boat.
As soon as Alchemy hit aitch-two-oh, a pressing concern meant I needed the slings to be kept on for a few moments. There was a chance that a few years out of the water had, despite my inspection of seacocks and hose clamps, caused some hole or crack to appear and would allow water in the boat. There was also a possibility that the freshly installed "Dripless Shaft Seal" on the freshly installed drive train would not, in fact, prove to be remotely dripless, and that an operation called "burping" would be required. As would the laboriously wired bilge pump of bigness seen below:
The dichotomy of dry in and wet out remains fascinating.
Non-boat owning readers, or owners of boats with traditional "stuffing boxes" that are supposed to drip into the bilges, may not appreciate the pleasure with which the owner of a just-launched steel boat regards a bone-dry bilge. Steel boats, it is said, rot from the inside out, and all the painting and remediation is ideally linked to the reduction of water on the inside to as close to zero as is possible. If sinks, spills, condensation and shower sumps are, as is customary, going to be part of the boat's working life, then the goal is containment and confinement of whatever water's moving about the boat, timely removal of same, and ventilation sufficient to dry out condensation that can form when a boat filled with warm or warmed air sits in cold water. You could write a book about it, really, but the start point is keeping the water out of the lowest, coldest parts of the hull, the dreaded standing water.
Not seen: Moisture. Seen: Recycled bilge pump hose and a potential wine cellar.
Not a drop was found that day. Very good news for me, for my expert installer Cap'n Matt (this bit being very important to get right, and he'd done a very similar installation on his steel boat Creeation), and good news for the shore crew, who could direct the crane to the next boat and forget about my dramatic needs and go-tos.
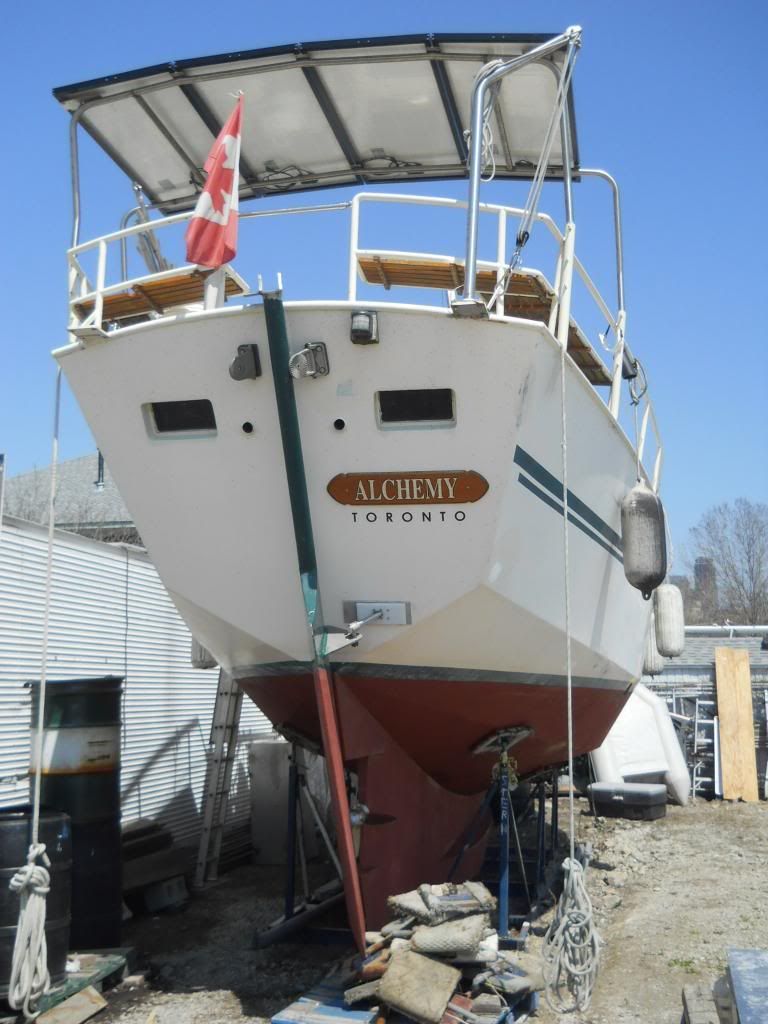
And after a misjudgement in steering and "way on" that reflected the skipper's long absence from the hydraulic helm and a second go-around by the tow boat (the engine's in but the fuel system is not) in order to lay her safely on the dock, the very gratifying sight of our future home at her designated berth made both a very long day and a sometimes frustrating winter and spring all worth it.
Heck, she looks a lot bigger in the water than in the cradle!
The online log of S/V Alchemy, her restoration, her crew and their voyage
“You never enjoy the world aright till the sea itself floweth in your veins, till you are clothed with the heavens, and crowned with the stars: and perceive yourself to be the sole heir of the whole world.”-Thomas Traherne
"He that has patience may compass anything."-François Rabelais
"The Great Lakes sailor is wild-ocean nurtured; as much of an audacious mariner as any. "-Herman Melville
"[The sea is] neither cruel nor kind ... Any apparent virtues it may have, and all its vices, are seen only in relation to the spirit of man who pits himself, in ships of his own building, against its insensate power." -Denys Rayner
“For those who believe in God, most of the big questions are answered. But for those of us who can't readily accept the God formula, the big answers don't remain stone-written. We adjust to new conditions and discoveries. We are pliable. Love need not be a command nor faith a dictum. I am my own god. We are here to unlearn the teachings of the church, state, and our educational system. We are here to drink beer. We are here to kill war. We are here to laugh at the odds and live our lives so well that Death will tremble to take us.” -Charles Bukowski
"A dream you dream alone is only a dream. A dream you dream together is reality." -Yoko Ono
My wife, my teenaged son and I plan to start voyaging in spring of 2020, plagues notwithstanding, for an estimated five to six years. I hope to move us aboard before that point to work out the kinks of living on a boat.
The careful reader will note the URL of this blog has "alchemy 2009" in it, a reference not only to our boat's name, but also to the original, anticipated departure date.
This is called "tempting the gods of the sea and life in general" and will not be modified. You have to know when to fight, and when to appease. Frankly, it matters that we go, not when we go. This is a good lesson for all aspiring voyagers, I think: the hubris of long-range planning lurks like an evil watermark on every "to-do" list.
Here you will find various notes on our preparations, labours and education as we try to become better sailors in a good old boat. I hope to continue to discuss in this blog the realities of preparing for a marine-focused extended sabbatical, the issues both mundane and philosophical confronting the potential cruiser, and the efforts required by everyone involved to make it happen.
Please note that all text and images on this site are copyrighted and may not be used without permission of their respective authors and creators.
Please note that I have not bothered to resize photos and they may be seen at full size and aspect ratio simply by clicking on them. Some photos formally hosted on third-party servers are not at present appearing; I will locally host these photos as I can afford the time to relink them.
Please also note that anonymous comments are usually spam and will typically be deleted without reading.
Author's text and most images other than product shots specifically created by product manufacturers are copyright 2006-2021 M. Dacey/Dark Star Productions. Photos sources linked from online news and related organizations are copyrighted to their creators.
Middle-aged, bookish Canadian with compact family in process of exploding career and prospects in favour of lengthy, low-rent sabbatical has boat, seeks ocean. Must have non-smoking bilges.
All contents (C) 2007-2021 M. Dacey/Dark Star Productions