The close of 2016 marks the tenth anniversary of our ownership of
Alchemy. I'm aware that's a long time. Other sailors keep reminding me. But while we're still refitting her, we've made great progress of late.
Now, to be fair, I didn't start
seriously changing things
until 2009, when we committed to a few seasons on the hard to replace the drive train, pull the tanks, etc. Until then, she was just one of the two boats we sailed.
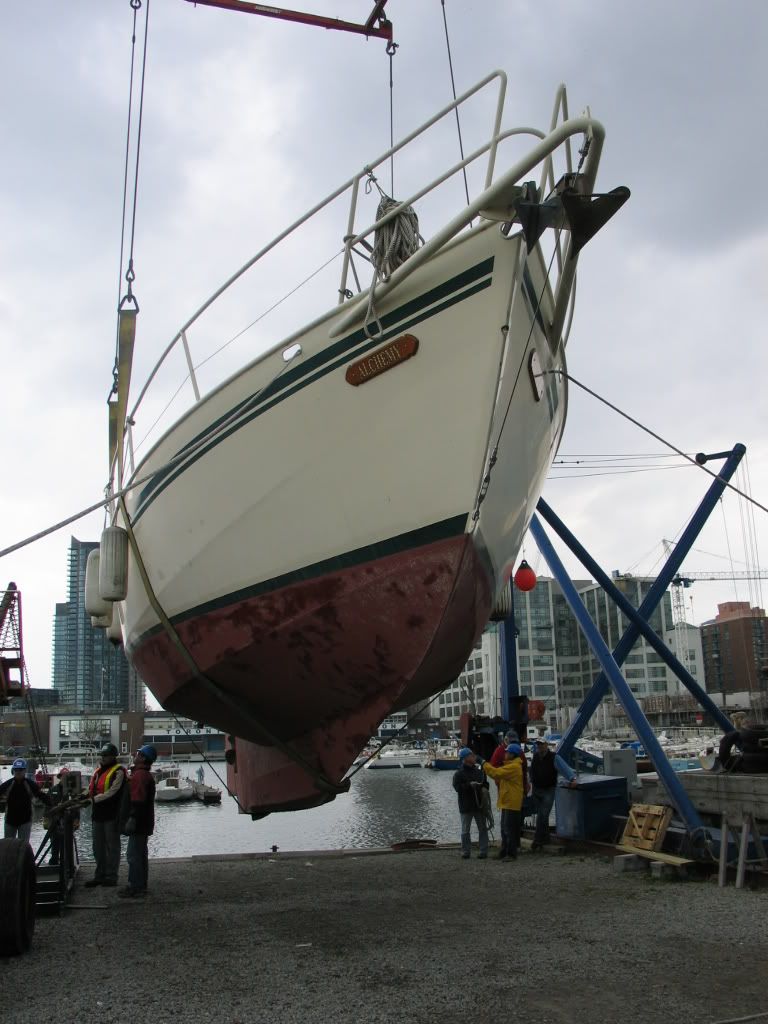 |
| The way we were, May, 2009, being shifted to a new cradle spot. |
One of the great challenges of the refit, aside from convincing my boat club I wasn't going to stay stuck in the corner of the yard forever, was gaining the "trades" experience to do most of the refitting on my own boat. I would not characterize myself as an expert in anything, really, but I've learned a great deal about marine engines, electrical systems, plumbing, coatings, and fabrications of all types. More to the point, I think (he said, hubristically) I'm harder to rip off, because even if I can't do all the work I need, I have, generally, a far more detailed sense of what is involved in delivering a given service or fabricating some bit of kit aboard, which is most often something I've designed alone or in consultating with the person ultimately fabricating the piece.
 |
| Plan "A", last consulted in 2015. |
Now, while I purchased a small, wire-feed welding unit some time ago, the lack of space for a welding table, plus the difficulty of getting 20 amp service from the house to my garage (the price of copper means setting this up would cost more than the welding unit did), means I've barely gone down that road, though I've got the rudiments. By that, I mean I think I could weld 1/8" steel plate to make tabs or light frames without setting fire to myself. But steel is forgiving, and, in welding terms, predictable.
Aluminum is different, which is
why I called in a fabricator to do the engine bay hatch in the first place. Said fabricator, while a nice enough guy, had too much work to do over the winter and had to concede he was unable to do the work. So I put up with the same stupid wooden unsupported heavy goofy hatch I had before, just 25% lighter because I had cut it down.
 |
| Behold Plan "B". |
As is so often the case, random conversations at the club, often featuring my whining at the fact I can't find reliable fabrication services for the stuff I'm grossly underqualified to do (mildly unqualified I will happily attempt if I don't bleed too much) yielded a name of a relatively new member. In fact, it was the guy taking over the committee chair position of the mooring committee on which I volunteer. My "new boss" in the club, so to speak. Turns out he's a
professional welder/fabricator and millwright. He commutes for his work week here in Toronto, and works on his own boat in the evenings and has access to a full shop. Now we're talking! So talk we did, and I explained the various fabrication and welding jobs I needed doing:
- Engine bay hatch
- Companionway door
- Clamped on support struts and welded cross-piece for solar panel arch's nav station; repositioned arch plate supports for outboard solar panels
- Studs for hull zincs
- Cutting off old hull appendage for defunct "video depthsounder" and plating over the hole.
- Etc. There's a big list of "things I would fancy" beyond just what I would like done this winter.
 |
| Dogs 30% less scurvy. |
The fellow in question has his own boat and understands what I need. He likes my detailed if probably unconventional technical drawings and has helpful suggestions. He's not rapacious in his pricing, and, as seen above, keeps me in the loop with his own design ideas, as can be seen above. After taking his own careful measurements, we discussed what would work best for this job. Above are the old wooden hatch dogs. They are good enough to recycle, and match the
Lonseal teak and holly vinyl flooring I will install when the weather warms up. The hatch gasketing will be fitted by removing the existing plastic strip atop the steel "lip", cleaning up the steel surface to make it glue-free, painting said surface with brushed-on galvanic paint, and adhering a resilient rubber 1/4" gasket in the shape of an "L" along the vertical and horizontal surfaces, and in affixing gas struts so that the hatch can be lifted fully vertically...and will stay there unless shoved down to the horizontal. All that is stuff I can handle. The stuff I couldn't came aboard last night:
 |
| Only 1/8" thick, but the underside framing means it does not budge. I know, I tried. |
The surface, of course, will be covered, and the underside will have soundproofing panels. The effect should be a further reduction of the already quiet diesel (at least with the hatch down). This hatch is lighter by about 30% to the wooden one, and I await warmer weather to do my part. The fabricator has persuaded me that a piano hinge end attachment with flush-set fasteners will be superior to my initial idea of clevis-style pins at the corners. Furthermore, he's already made a steel T-bar cross-member (to be removable should I ever need to haul the engine out) to support not only the fourth, aftmost side of the hatch when closed, but also the forward side of what was going to be the fixed, rear part of the engine bay hatch. I've since had some new thoughts on that little otherwise useless space. You can see where the engine bay light is in the above photo that it's basically where one's foot first falls in the pilothouse off the companionway steps. Much of it (about 30 cm.) is
beneath those steps.
That's dead space, really. I mean, you could keep the flares under there, I suppose. Too small for the life raft or the ditch bag.
 |
| I'm back, and improved! |
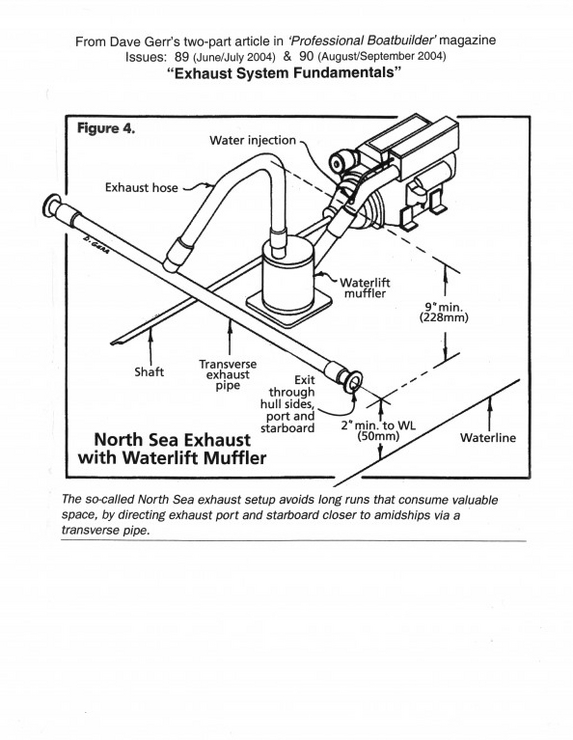
But wait, wasn't I going to install a transverse, port-starboard exhaust system,
as OK'd by the author, Dave Gerr, in whose fine boat reference book I first saw it? Why, yes, I was. All the necessary bits are in fact already aboard. It's something I can rig in cold weather, should I wish to. My improvement is this: Note that in the above diagram, a nine-inch fall between the top of the exhaust hose section between the waterlift muffler and the exhaust ports in the hull is required. I can't do that in the current set up, as the underside of the decking is perhaps five inches above the starboard (and, eventually, port) exhaust.
But if I put some sort of insulated box under that last step, or, conversely,
replace that last step with a box capable of supporting crew weight, I can run the waterlift to T-fitting loop inside that box, properly secured, and then it's a downhill run of well over nine inches in drop to the exhaust port. I can, finally, lose the anti-siphon break, the bane of my marine engine experience.
If I've made a mistake with my logic here, please let me know. Making water flow downhill from a marine diesel with its exhaust flange at the waterline is admittedly a dark art, but if the solution is to put the loop discreetly outside of the engine bay, I'm all for it. Having a custom boat, it's sort of the point to think out of the bay.
Lastly, a seasonal shout-out to my readers, both ashore and at sea. May your rum be plentiful, the winds fair and your crew friendly! I'll see some of you in a month at the
TIBS. Until then, a blessings on your collective doghouses.


