Copyright (c) Marc Dacey/Dark Star Media 2006-2020. Above photo (c) Marc Dacey. Powered by Blogger.

2017-07-21

Filter search


Supposedly rare, these bright little twerps seem to dislike my head
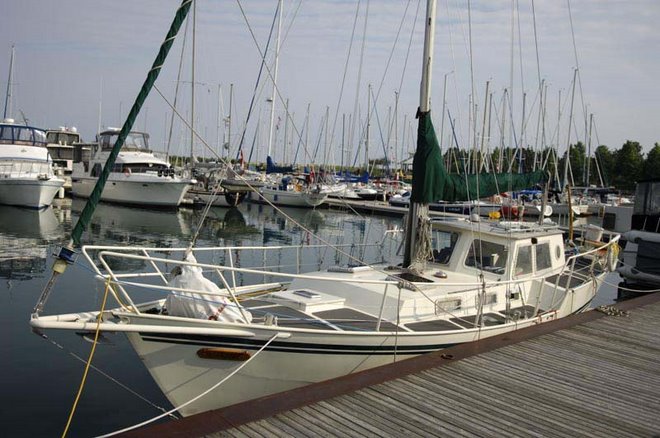
Before we get to today's rant, it must be said that spending a lot of time aboard a boat does expose one to a more varied palette of nature. These are barn swallows on our rail; Mrs. Alchemy, an expert in such matters, says they are "threatened". Perhaps by those humans they imprudently dive-bomb, perhaps. I counted six when I came aboard the other day and peevish they were, too. And keen on low passes over my head. I had the wife check the anchor well for a nest (it wouldn't be the first time: we've had ducks), but she called out the all-clear and besides, they prefer the boom, which is why she's stuck a Scotch-Brite pad in there. Seamanlike prudence comes in many forms.

To make? Small change. To buy? Oy.
The humble object pictured above is the transmission fluid filter for a Hurth ZF25A hydraulic transmission, such as is usefully bolted on the back end of Alchemy's Beta 60 diesel. The manual I treat like holy script, for lo! we wish to power our ark for many thousands of hours before rebuild! suggests an initial filter change at 25 hours of run-time. Well, it was more like 35, and there hangs a tale.

Despite the very common nature of ZF transmissions, both mechanical and hydraulic, and also despite the fact that this specific filter is used in a wide range of Hurth transmissions, including ones suitable for engines seven times more powerful than ours, it was a hard item to source and the prices quoted had no relationship to each other, or indeed, to reality.

Such is the process of spares acquisition, unfortunately. A filter is a simple thing: oil filters, being common, are cheap and plentiful. "Marine", however, infers a yachtie level of free cash sloshing around the bilges, and this is reflected in the price. My odyssey of bargain-hunting (which is very much a relative term in this case) involved about eight phone calls to various local suppliers. Few had the filters or knew how to get them. One took several calls and messages to get back to me and then couldn't quote a price ("...ah, maybe a hundred and a quarter?"). One very helpful woman, Peggy from Eastmar Marine, was able to find this filter, but the price varied from $135 to over $210 Canadian. Keep in mind that this is something I'm supposed to change every 300 hours. I could put 4,000 hours on in the next five years.

I did find one on eBay for $50 in American currency...but the "freight fee" for this 50 gram little box was an additional $45! I have, as has proven to be wise, a U.S.-dollar VISA card and some funds in that denomination tucked away for these sort of purchases, but the price galled me. I went to the ZF Parts distributor list and found the one place that had a toll-free number. I wasn't going to compound my wallet's reaming with mid-day long-distance charges. The laconic but efficient Georgian on the other end of the line said "yes, I have some at $50." I said "how many do you have?" "Five." "I'll take them all." They are a consumable, after all, and I care not to worry about this until I have 1,525 hours on the tach. They arrived in about four days and cost, all in with freight and customs, about $350 U.S., or $70 per. This was still cheaper, even with the exchange rate, than the cheapest, if vague, Canadian supplier's price, and while I'm not happy with it, I am more content than had I bought one and one alone around here.
I've often thought of marine mechanicals manuals as the Berlitz course of sailing
After further thumbing the already well-thumbed documentation, I removed the "old" 35-hour-runtime filter, which looked (of course) immaculate. It went into a box called "SPARE", because if my last one goes, I like to have a "get me home". Yes, I checked for bits of metal and other evidence of hard use...nothing. Looked minty. So a spare it becomes. Then I looked for the drain plug.

Hmm. The diagram in the manual suggested low (naturally) on the housing and on the starboard side. Feeling around didn't reveal much save for the cooling fins (or what I assume do that on a hot transmission). Fetch the extendable dental mirror. Nope. Get the inspection camera. Wow, needs a spot of paint, but no plug. Then...ah hah! I felt the port side of the housing. There you go.

The plug was a brass hex bolt with a straight thread, gasketed with an O-ring. It was a European piece of kit and so was presumably metric. I had only one socket, however, that fit: 7/8th inch. And it wasn't so snug. That suggested 22 or 23 mm...sockets I (of course) lack. I top out at 21 mm. Again, this is utterly typical of the refit experience.

The draining did not go well. I needed a third hand as I was doing this over the metre-deep aft bilge and I didn't want to drop the plug. I needed a bigger funnel, a bigger measuring cup or (ideally) a sort of pan I could hang off the transmission to capture the draining fluid. While I got the job done, somewhat messily, it led me to consider alternatives to a drain plug, which led to an interesting bit of crowd wisdom on a sailing forum.
The good part here is that two jugs of fluid are good for over five changes. If I don't spill it.
Topping up was easy, although the "not too much" band of filling the transmission is, to judge from the dipstick, fairly narrow. I used a Dexron III-type nothing special fluid as recommended in the manual. That's the cheap part of the operation: that the transmission takes nothing exotic or hard to source. Like the filters.
Some of the many jugs necessary for smooth operation.
Next comes the first oil change at 50 hours. I feel that will go more smoothly (the Beta has an oil change pump on one side) and certainly more cheaply. But the lesson here is it pays to shop and it pays to buy, where logical to do so, in bulk for those things you can anticipate using, like filters, gaskets and other "consumables". The freight for a dozen is often barely more than the freight for one.

2017-07-16

Fab results

Four years, four months later...
The process of boat refitting is rewarding and frustrating in equal measure. The reward is in gaining skills and experience that will undoubtedly be required once the voyaging begins. The frustration is realizing that sufficient skills to do some jobs cannot be learned in a timely or effective fashion and that outside help will be required. Such was the case with our desire to replace Alchemy's flimsy and awkward dropboard-style companionway hatch.

That hatch, which mated with the oceanic-grade sliding hatch in the pilothouse roof, was flimsy because it was just a quarter-inch-thick sheet of smoked Lexan glued to a cherrywood lip, which slid into two grooved pieces of wood screwed into the steel sides of the pilothouse formed into a supporting flange. A single kick...or even a modest pooping wave, would have stove it in. Adding to this impression of insufficiency was that the dropboard, relying on mere gravity to keep it in place, was ungasketed: a driving rain or a snow-covered deck would cause water to seep down the companionway steps, ticking off the skipper. The dropboard was awkward because it was either all out or all in, a 16 x 26 inch flat wind-catching rectangle of bother that had no proper home when out and would constantly fall over if not secured strongly. The redesign came early, as did the frustration, because while I could draw what I wanted, as I did with the engine bay hatch (which turned out differently once I confabbed with the fabricator), I did not possess the skill nor the tools to do it myself.
Both frame and door hatch materials were made from stainless steel plate and bar stock bought locally
So Andrew Barlow, fellow NYC club member and welder/millwright/fabricator extraordinaire, was put on the job. He is approximately the fifth or the sixth person with his skill set to have seen and commented on my design, and it is the bane of my existence that I can't despite my best efforts persuade tradespeople to come to work on the boat. Part of that reason is that the work is on a boat: many fabricators are unfamiliar with them and prefer to stay in their fully equipped, predictably immobile workshops and I can understand that. Andrew, by contrast, lives on a vintage wooden power boat during the week, and goes to work in a 24-foot Shark. He gets boats and consequently, grasps (and can creatively critique) my ideas, such as they are. And, from my point of view, he actually executes the work, which is the hardest stage to overcome. I sent the above design to some professional marine fabrication places and was basically told "your job is too small for us to bother with."
SS hinges! The bar across the top was just for support and to keep the pre-welded-in frame from twisting.
As it turned out, there were a few onsite mods required, and the full-on custom approach paid off. Also, seeing a heavy chunk of stainless steel fabrication emerging from the small cabin of a Shark sailboat rafted off my starboard midship bollard proved amusingly nautical.

This piece was "dry-fitted" more than once to ensure as snug a pre-weld fit as could be managed. The only thing I really changed was to nix the fixed port in the upper hinged part of the door, which was dubbed "the cat flap".
The new door was meant to a) take a pooping (over the stern) sea, although that is pretty rare due to the height of the "stern castle" of Alchemy,  My job was to take off the painted plywood outer surface of the aft steel plate of the pilothouse; it was held on but simple galvanized studs and plastic battens and was construction-grade exterior plywood sheathing. It wasn't going to be missed. I also sourced after much searching the beefy "hatch dogs" that would act both as handles to the upper and lower parts of the companionway door, but would also secure it, thanks to the magic of compression, against seas and, with the addition of a locking mechanism, potential intruders. I am a big believer in deterrence in the sense that if you make your already clearly metallic and industrial boat more metallic-and industrial-looking, thieves will move on to the airy and bright Beneteau with the beautiful paint job three moorings over. Nobody wants to steal a dirty hammer.
This relatively minor sub-plywood rust has already been "Ospho'd" and painted. A decision about insulation and further covering this will come later when some other decisions, like where to put the propane supply, are made.
As is customary with jobs like these, I want the welder to do welding. Cleaning up the surfaces, removing the flammable stuff and making sure the beer is cold are my jobs, as was running a "clean" 15 amp 12 ga. line to the power post as the compact Miller welding machine kept tripping my onboard breaker.
Amazing to watch, if indirectly, Andrew was the perfect combo of fast and fastidious.

I'm only part-way through educating myself about welding, so welding chat with Andrew was confusingly technical but illuminating, as was the combination of stick tack-welding, as in the above shot, and MIG welding with stainless steel wire to "fill in the gaps" later on. I was impressed by the quality of both Andrew's gear and his technique. I don't have the shop nor the experience to have made this job a reality.
An early fit: We learned that the massive dogs would interfere with the flap lying flat enough to open the whole hatch enough. They would themselves get ground down a bit.
A note on the design: As can be seen, Alchemy's pilothouse roof is not flat. Like its deck and its solar panel arch, it is curved to shed water more effectively. This means, however, that a single-plate  companionway hatch door hinged on one side cannot open beyond 90 degrees to the roof. To do so, a second hinge must allow a "flap" (dubbed "the cat flap") to fall forward so the whole door can nestle under the overhang of the pilothouse roof. Such a door is known as "a Dutch door" and was inspired by one used by long-time cruisers and writers Evans Starzinger and Beth Leonard. Besides solving the opening issue, the cat flap allows a nice 25 cm. opening for ventilation and communication between sailing helm and pilothouse in all but severe conditions.
Some discussion about cutting down these handles was necessary.
That was the theory, anyway. Much of my refit journey has involved making virtues out of necessities.
More lining up revealed a gap in the plate that Andrew would fix.
A couple of fitting and modification sessions later (during which I had to take apart and reinstall the old crappy dropboard pieces so I didn't leave the boat wide open), we were largely done.
This flange on the cat flap comes just inside the overhang of the sliding hatch.
 In the photo above is the flange that mates with the underside of the sliding hatch when closed. Gasketing may be required here, but it will be hard to do permanently until I physically bolt the pilothouse back down later in the summer after installing several necessary wire runs and after using HDPE plastic, butyl stripping and Tef-Gel-isolated bolts to dog it in place.

The stainless steel part: Filling the gaps between frame and bulkhead with molten wire.

That visible rust is what happens when you grind SS with a non-SS wire wheel: residue.
After Andrew's part was finished, I had a door that would open, close and flap down, but nothing particularly tightly. That part was on me. I cut, fitted and glued rubber stripping and an HDPE strip of thin stuff (1/32nd of a inch thick) to make the door have a compression fitting to block water ingress, and then I fabricated out of UHMWPE triangular wedges against which the dogs could further compress the door at four points.

Needs a daub of paint and probably a layer of insulation, but I got what I wanted.

The wedges are secured by bolts drilled through the SS frame and the mild steel pilothouse plate

The remaining to-do jobs in this respect are mainly cosmetic.We can paint this or insulate it and paint it, and I need to pack the handles with some sort of grease to keep them limber in their nylon bushings. In addition, we have to decide if we want some sort of peephole or small fixed glass porthole to let in light when the boat is sealed up here. Also needed is some sort of means to hook or otherwise capture or restrain the entire door when it is fully open at sea ("fair-weather mode"). Still, it's been a big advance and clearly, a long time coming. Yay us!