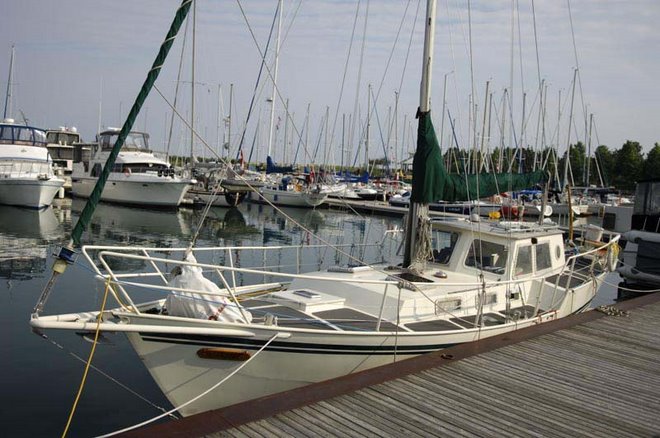
Copyright (c) Marc Dacey/Dark Star Media 2006-2020. Above photo (c) Marc Dacey. Powered by Blogger.

2020-02-20

Workshipping (1)

That's possibly too many lubricants.
Four years back, I sketched out a vision of what I wanted to do with the workshop in the forepeak of Alchemy. The first seven feet of the boat is a a snug, utilitarian room forward of the collision bulkhead that is reached by ladder beneath a strong steel hatch on the deck. I had ideas of putting a bicycle seat on a post in there, and having a fold-down cot for extra crew on the starboard side, and of having the windlass over the anchor well. I even wanted to cut a big, doggable hatch (above the waterline) into the saloon with an eye to ventilation and even working on the boom down there.

Well, a lot of that thinking has gone by the wayside. The ladder down into the forepeak is not a big deal and it is a compact solution to egress and the thought of engineering a square hole into the saloon...without compromising the deck support...seemed unnecessary. So did the idea of a folding cot down there. We've determined that we can stow storm sails and the light, if voluminous, cruising spinnaker in the available space if it's better laid out. The windlass was ultimately positioned farther aft so as to drop the anchor chain farther aft (better for weight out of the ends). The batteries powering the windlass are at the foot of the ladder (covered, of course) and on the centerline. The charger is on the bulkhead and there is now 12 VDC and 120 VAC (20 amps, too) outlets in this little compartment. Little bright lights to follow.
The heavier things are now farther aft and the tools and spares aren't all on the port side now. Trug is still misspelled.
This is the new look going forward. Experience actually sailing with a bunch of long/tall bits of gear have persuaded us that a sort of "rack" in which to stow the tiller, oars, PortaThwarts, and the sailing rig, rudder and centerboard of the nesting dinghy. Most of this gear is light and will, if restrained by shock cord, stay put even in rough seas, but the keyword is "restrained". The rest of the starboard side of the workshop space is now ready to have another 53 inches of working surface. This is, on most boats, an unheard-of luxury.
Working the grinder meant putting a fire blanket over the batteries to even nod in the direction of "to code"
Once again, welder/fabricator Andrew Barlow was enlisted to weld together three lengths of 1.25 x 1.25 x 3/16th inch L-bar mild steel into something strong enough to take a marine plywood top (that's my job to obtain and cut). The foredeck is covered in boxes of line, shore power cords, a few sailbags and other bits and pieces formerly loose on the starboard side and bungeed into lumps. As soon as the weather crests freezing, Mrs. Alchemy will coat the exposed metal and the weld beads I've now ground down to keep this stuff from rusting.
As can be seen, some of those tools and spares on the left would be better on the right.
I discovered, too late, that there was no 15 amp outlet on the marina's power posts. We've used 15 amp service successfully in the past via one of my 12 ga. contractor-grade extension cords, but this time, I had to take power from the 15 amp outlet inside the boat, powered from the 30 amp shore power service.
Stick around, you'll learn something.
Unfortunately, this circuit breaker kept tripping, and the irony is that I knew I was receiving two Honda eu2200i gasoline generators the very next day. Combined, these two beasts could have easily supplied Andrew's welding rig with enough juice to get the job done.
When sparks fly...you vacuum the entire compartment the next day.
So I spent quite a bit of time waiting for the breaker to trip and then flicking it back on. Andrew started to do shorter beads and eventually got full penetration of the welds, but it was an annoying few minutes and I was feeling the AC breaker board for any signs of warmth. There wasn't any.

So simple, but it will be so useful.
So we paint, and then I cut the plywood top to fit and then I bolt said top to the metal and rearrange the tool boxes and spares stowage. I have SS eyebolts so I can hang spare line more neatly, and eyestraps to keep everything lashed down. Lastly, I'll add a few more lights down there and get a larger "trug" for the anchor chain.
These are locked to the mast, so no funny stuff.
More fun to come soon as we ramp up to moving back aboard.

2020-02-16

Cabinet shuffle

Behold! Custom cabinetry. That microwave is actually a dead version of the one we currently use and which is "right-sized", at a mere 700W of draw, for occasional use aboard.
What is stowage? More than just a mispronunciation of "storage", stowage is specifically securing items on a boat so that they can't fly free on a seaway, which would be comical were a rubber spatula involved, and fatal with a large, full can of paint or "Big Bertha", your favourite motor mount persuader.
Yes, this is the sort of tedious detail with which I plague craftspeople who know their business.
The stowage lacking on the good ship Alchemy is has been centered in the forepeak workshop (more to come soon on that topic) and in the galley. As discussed in the latter half of this post, there was a big empty space above the sinks just crying out to be filled with useful stowage, and to do so in a way that was functional and didn't look like treefort-grade crap was beyond my skill set.

Enter Fred Blair. Fred is a pal of my father-in-law, Dave McMurray, who designed boats and ran a Pickering, Ontario-based chandlery in the 1980s. Fred and Dave connected via that work and presumably found common cause as Fred is a "Shipwright, Cabinet Maker, Custom Woodworking" person held in high esteem by Dave. So we met in January and he took the job, which was good for us as we had had poor luck to that point getting this particular task fulfilled.
Photo (c) Fred Blair: Shipwright, Cabinet Maker, Custom Woodworking
As can be seen, the cabinet we wanted was, design-wise, pretty basic, but had to be of undisputed strength, given the motion of the ocean and the prospect of jamming it with not-entirely light cookware.
Photo (c) Fred Blair: Shipwright, Cabinet Maker, Custom Woodworking
Early on, we decided against the five-inch-tall "mug rack" below the microwave "nook" in favour of taller cupboards on top. This allows a more logical arrangement of wide, short things, such as barbeque tools and our electric grill, up top, and pots and/or bulk food supplies below.

Routering the right way.. Photo (c) Fred Blair: Shipwright, Cabinet Maker, Custom Woodworking

Fit and finish with the hinges of wonderment. Photo (c) Fred Blair: Shipwright, Cabinet Maker, Custom Woodworking
The interiors are beautifully finished; the only alterations I've made, save for the mounting holes drilled earlier today, are to put a series of vent holes on the underside of the dish storage area. If dishes are stowed still a little damp, they can drain over the sink closer to the centerline.
Varnishing. Photo (c) Fred Blair: Shipwright, Cabinet Maker, Custom Woodworking

In addition, the internal shelves and separators can be moved about and independently secured as needed, and the rear of the microwave compartment is well-vented to lessen the chance of overheating.
The finished product at the shop. Photo (c) Fred Blair: Shipwright, Cabinet Maker, Custom Woodworking
The hinges are something else. They close almost hydraulically and once I install the magnets Fred provided, I suspect they'll need a fair bit of force to open, which is desirable on an ocean-bound vessel as we hope to sail.
Even the back is pretty.
Installation of a cabinet made of 3/4" marine plywood means some tricky maneuvering. I'm not sure what this cabinet weighs, but it feels similar to our 30 kilo SPADE anchor, Naturally, one item is made for dropping and the other isn't. After measuring out and drilling some mounting holes (note the big and torquey Makita drill I trot out for whipping through steel bulkheads), I had to fab up a sort of strut to keep the cabinet, which at one point had all three of us positioning it freehand over the sinks, supported while I drew drill marks on its future home.
The leftovers from the boat cover construction find a use.
A quick blast of epoxy paint on the bare metal, which still took, Makita enthusiasm notwithstanding, three drill bit changes to get up to the desired 1/2 inch bolt hole sizing, and we were ready to dog down.
This will be recovered by the fitted cherry strips that were there before. I don't think the bolts I've used will be too proud.
 And here's the result. The internal partitions were removed for reasons of access.
Fits like a charm. Picture a spice rack in that space above.
The mounting bolts have washers either side of the bulkhead and the cabinet, and are secured by heavy Nylok nuts. Picture also some sort of 12 VDC pointing directly down into the sinks.
There is not a huge amount of clearance here, but I can see to wash, and Mrs. Alchemy, at a foot shorter, likes the ease of access to the cabinet contents.
This cabinet solves a lot of problems for us. That open area on the side-mounted cabinet held the microwave before, and is now freed up to hold food or bottles. The cabinet is strong enough and well-bolted enough to have on its side a handhold to make the transit to and from the pilothouse safer. All in all, we are well-pleased, and will be even more so once it's filled with our kitchen stuff. Thanks, Fred! And thanks to FiL Dave for connecting us with such a talented craftsman.

Drogue therapy

This is a Jordan Series Drogue as built by Angus Coleman of Ocean Brake in the UK.
There's a surprisingly long list of items, some quite expensive, one hopes never to use as a sailor. These include obvious ones, like a SOLAS-grade flare and the liferaft, to more cryptic items, such as drogues, warps and sea anchors.


Amusingly, the drogue, which weighs about 18 kgs., came wrapped in two very big IKEA bags.
The idea of a drogue is to slow the pace of a boat running off in heavy weather. Running off is the opposite tactic to that of heaving-to, in which the jib, main and rudder are all set so as to sail the boat slowly upwind. Heaving-to as a tactic is largely passive: one can tie off the wheel or tiller and essentially doze, if not entirely comfortably, as the storm passes over or even to delay a harbour approach until daylight reveals potential complications. Heaving-to is something some boats do more readily than others, and requires practice to fiddle with the sails in order to balance the desired slow forereaching that keeps the boat slowly "crabbing" forward.

The forces of the sails and the rudder nearly cancel each other out and the wave train is therefore met with "the pointy end" and at a low speed. Expect a twisty ride, but not a dangerous one. Diagram (C) Sail Magazine
To run off in a gale or a storm situation is a more active strategy requiring active steering, but it also allows more options in terms of reacting to worsening weather. Running off means to steer downwind at a slight angle to the wave train and (usually) the wind aft in order to make more speed either away from the storm or gale, or away from the dangerous quadrant of the storm or gale. The problem with running off is essentially the same as the problem with heaving-to: eventually, the winds and wave heights may exceed the usefulness of the given tactic and at that point, the transition has been made from "heavy weather sailing" to "survival conditions". Not good.

The IKEA bags reveal the drogue elements of bridle, leader, cones and tail. And the bag (black mesh) in which to store the lot.

If the skipper and crew have opted to run off in heavy weather, a problem that will soon be made apparent is that of too much speed. Even in conditions of reduced sail, or even bare poles, a boat can travel faster than its hull speed, at which point the rudder can lose its effectiveness and/or the hull can "surf" and be prone to broaching, capsizing or pitchpoling, all dangerous outcomes at sea.

The bridle "legs" are shackled to the chainplates bolted to the stern and meet at the drogue leader, after which the cones deploy.
The best option, once running off has been decided upon, is to ready a series drogue should the sea state intensify to the point where the boat may become uncontrollable. While this will vary from vessel to vessel and depends on hull type, design and less quantifiable aspects such as windage, the outcome desired is to slow the forward progress of the boat to allow the waves to roll beneath it. The boat is still sailing actively and is still moving, presumably away, from the worst parts of the storm conditions, but its speed has been reduced by the drag of a long, trailing line with fabric cones that act like a large rubber band to retard forward movement smoothly and which, thanks to a weighted end, will stay submerged in the advancing wave faces.

Now, this doesn't mean a carefree ride. Note all the complexities of retrieval of the drogue in a chat between sailors Randall Reeves and John Harries in the video above. And even the drogue won't necessarily keep you dry: The aft part of the boat can still be smacked by a pooping wave and the motion inside the boat can still be considerable. But if the boat is sailing actively, even in heavy conditions, the odds of not only surviving, but of preserving the rig and gear and avoiding injury or worse among the crew increase.
The black straps attach the cones to the drogue's single leg.
Series drogues exert great stresses on themselves, which are transferred to the hull. We therefore ordered ours with Dyneema cores, which made the drogue both lighter and more compact and stronger than the nylon-line alternative. Angus Coleman, the amiable contact at Ocean Brake in the UK, actually dissuaded us from buying the drogue last year as he was on the verge of introducing all Dyneema-core drogues and wanted us to have the opportunity to order that style. Of course, the Dyneema aspects makes the drogue less stretchy than nylon line, but I suspect this is not going to be a particular problem with our steel sailboat. Nonetheless, I am mindful that the attachment points must be engineered correctly so as to transfer all the shock loads that may arise non-destructively. So we are going to have chainplates fabricated to accept the estimated (by Coleman) nine-tonne working loads on the stern. We actually have beefy bollards that can likely handle these loads, but outboard chainplates throughbolted to the hull won't have anything to chafe on, nor will they have much of a chance to catch on the windvane or the transom-hung rudder.

So this is another piece of the puzzle of preparedness. While we will do a practice deployment or three, let's hope, as with the liferaft, we need never use the thing.